Record a presentation with PowerPoint
PowerPoint is a simple tool to use to record your presentation. You have the option to record your voiceover on the slide(s) or you can have your webcam video with your slides. You can use this for individual presentations or for a group presentation. The recording function is available from PowerPoint 2016 and later. This guide uses the Office 365 version (PC). Check with your group which version of PowerPoint they have to avoid incompatibility issues.
For recording with MAC, see the Record a slide show with narration and slide timings (MAC) guide.
For recording with older versions of PowerPoint, see the Older Windows versions guide.
Set up PowerPoint Record tab
- Go to your File tab and select Options. This will open up a new window called PowerPoint Options.
- Select Customize Ribbon.
- Under the Customize the Ribbon section, scroll down and select the Recording option, then click OK.
- You will now have access to the Recording tab, which displays options for recording your presentation.

Have a practice round
Before you record your presentation for submission, it is a good idea to have at least one practice round so that you can work out the presentation flow with the technology. An external USB microphone is recommended for better sound quality.
Tips for recording with a webcam:
- Put your webcam at eye level or higher – experiment for best angles.
- Have a light source in front of you and not behind.
- Make eye contact with the webcam and avoid looking too much at the screen.
- Remove distractions from your background - you want the audience to focus on you and not your background.
- Use a USB microphone if possible for better sound quality.
You can read more tips in this short article: 7 tips on how to make your webcam videos look good.
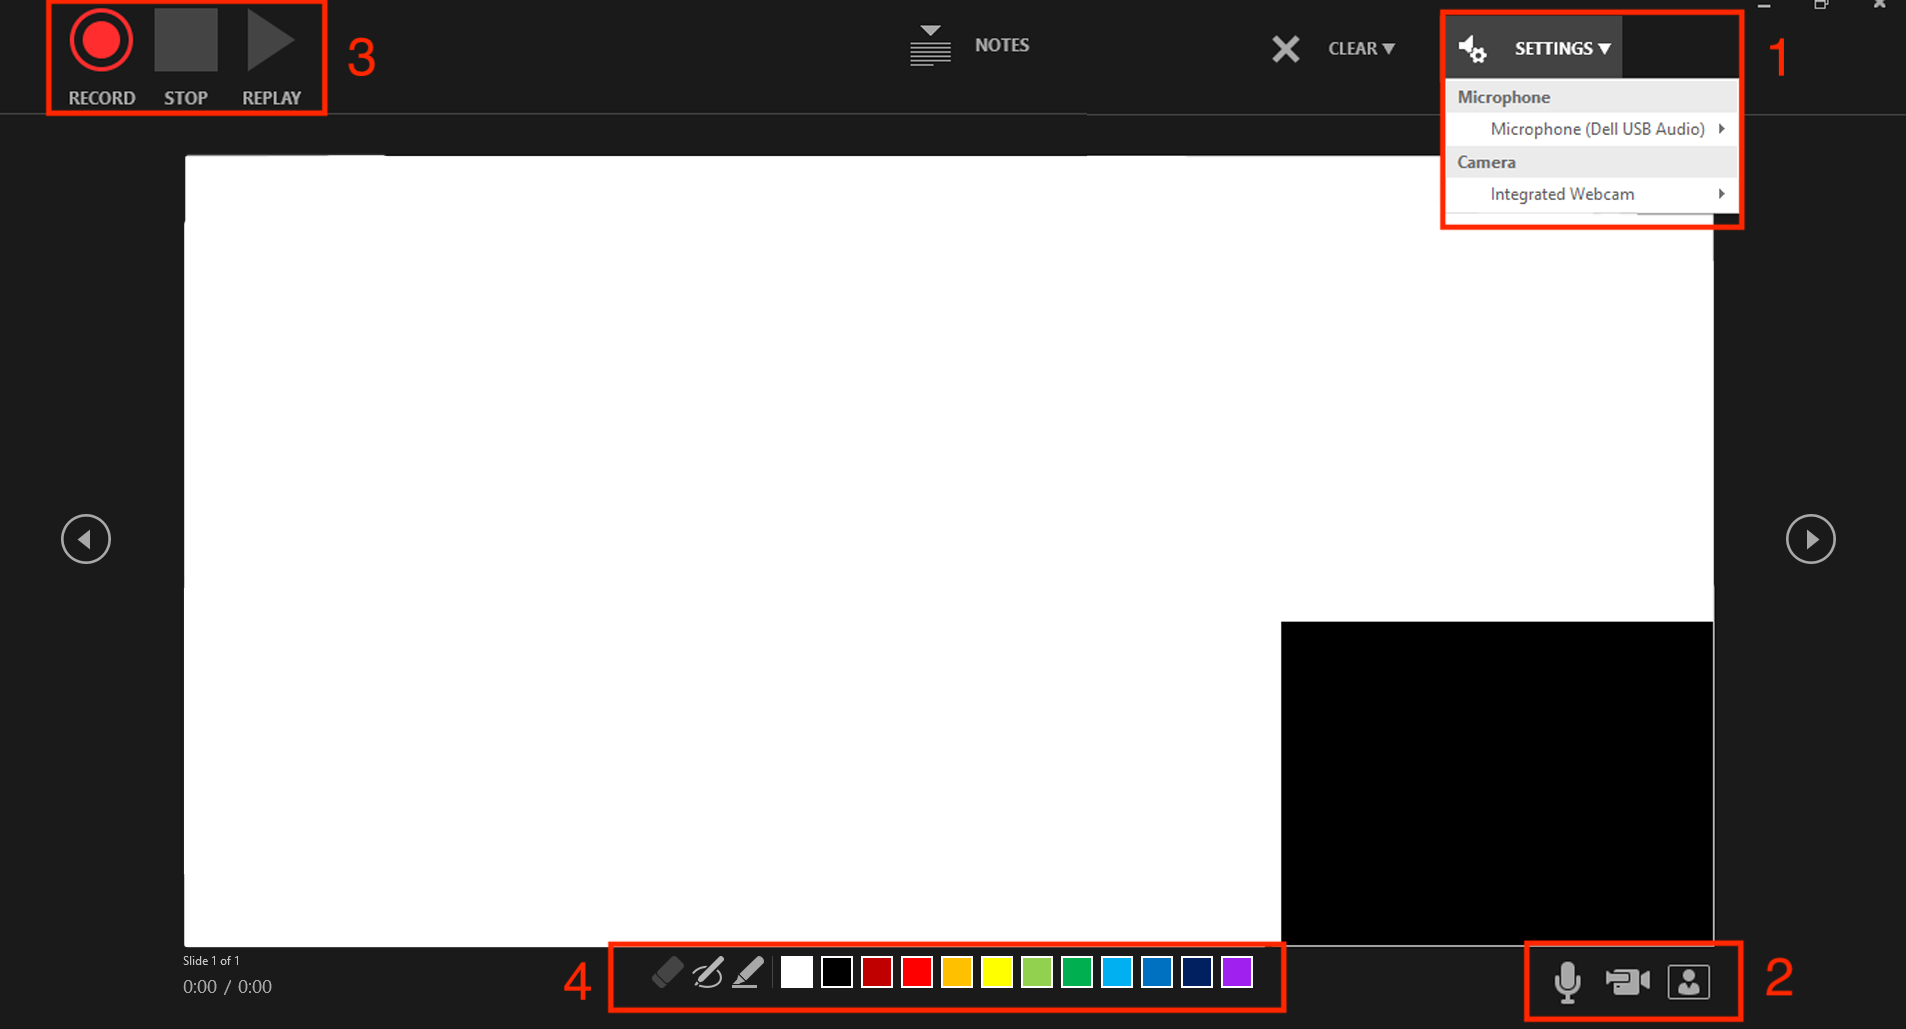
Record your PowerPoint presentation
You can record from Current Slide or from Beginning. Pay attention to which slide you are recording so you don't accidentally delete an existing recording. If you need to re-record a slide, you can use the options under Clear to choose to clear narrations on the current slide or all slides.

- Before recording, check your microphone settings and make sure you are using the desired microphone.
- Decide if you want to record with webcam.
- When ready, to record select the Record button. Pause or stop the recording at any time.
- You also have the option to annotate your slides or screen using the pen, highlighter or eraser tool.
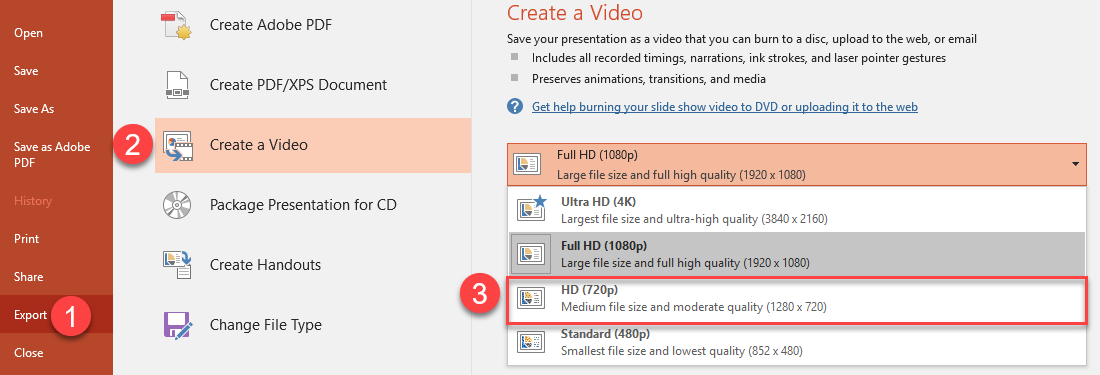
Exporting video files
In the record tab, you have the option to Save as a Show or Export to Video. Nominate one person to export the video and share the file with your group.
- When you select Export to video, the Export tab will open up.
- Select Create a Video and then select HD (720p) quality.
- Select where you want to save the file, name the video file and click Save.
- Share your video file with your group members in Google Drive or Dropbox.
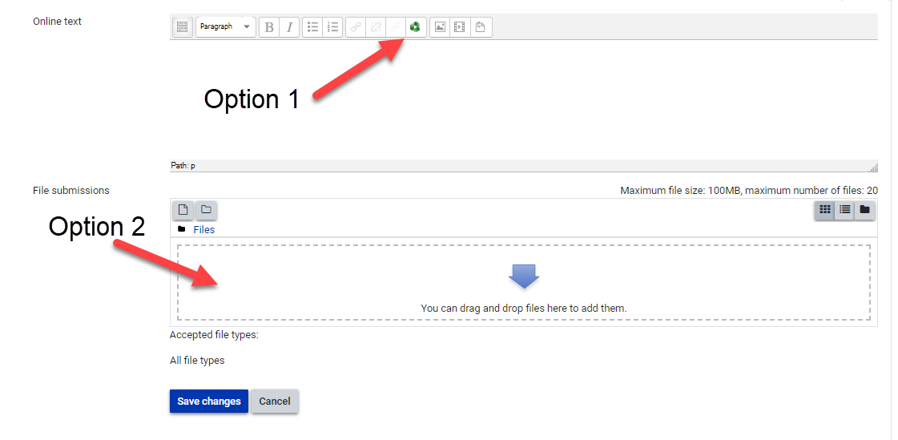
Upload your recorded video presentation
Once you have completed the recording of the group video presentation, you will need to submit this into your Moodle assignment. You can do this by either uploading the video to Panopto, or attaching it as a file. For more information, see the Library's video assignment guide.