Text and Media area (Label)
Text and media areas (previously labels) enable you to add additional text or graphics to your course page. They can be used to create custom banners for each weekly learning module/topic, display/embed multimedia on your main page, creating some visual separation from the rest of the content.
- In the top right hand corner of the page, switch Edit mode to ON(Blue).

- In the section where you would like to add a resource or activity, click +Add an activity or resource.

Note: You can add new resources or activities above or below any existing activities or resources.
- Select Text and media area, then enter your text in the text field.
- Once complete, click Save and return to unit.
Note: You can toggle the toolbar to show/hide tools by clicking on the Toolbar Toggle icon. For more information about the Text/HTML editor see Select default text editor.
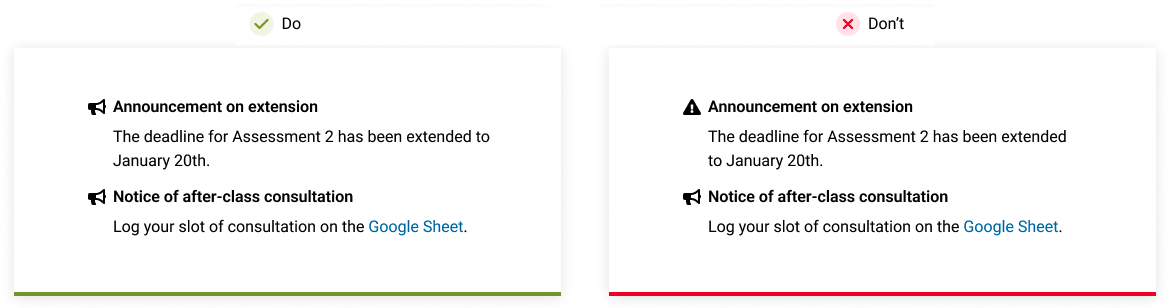
 View visual design guide
View
View visual design guide
View

Adding multimedia
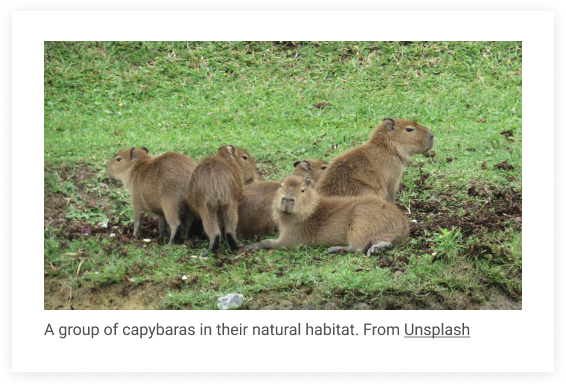
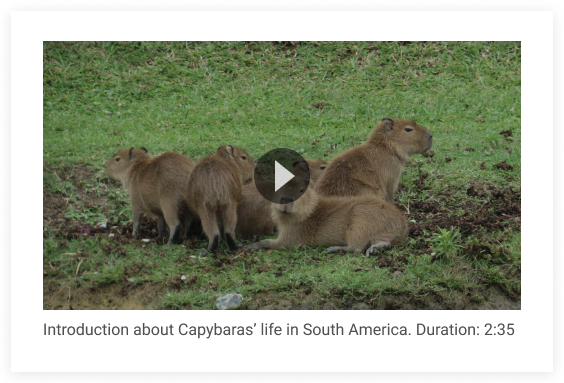
To highlight information or identify a particular resource or module, you can embed images, Panopto videos, H5P interactive activities and other forms of multimedia in a text and media area to display on your Moodle unit page.
- In the top right corner of your Moodle unit, switch Edit mode to ON (Blue).
- Click the three dots beside the item you would like to edit. Select Edit settings from the drop down menu.
- In your text editor, select the icon for your desired form of multimedia.
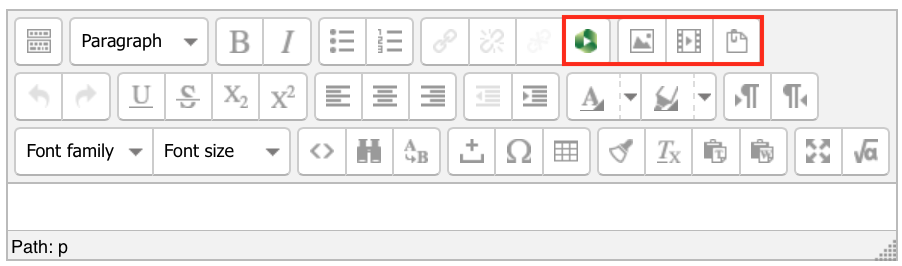
- For example, to insert an image, click on the Find or upload an image... button.
- Select the Upload a file and next to the Attachment field select the Browse button.
- Navigate to where your image is saved on your computer and select Open.
- When the file name appears in your Attachment field select Upload this file.
- You will receive a preview of your selected image in the Insert/edit image window. Once done, click Insert.
- In the Image description field, enter a short, meaningful description of the image (this will be read out to users of assistive technologies such as screen readers).
- Once an image has been inserted you will return to the text field. Scroll down to the bottom of the page and press Save and return to unit.