Group self-selection (Moodle activity)
The Group self-selection activity enables students to choose their own group within a grouping set for an activity. Group self-selection can be used to set up groups for forums, assignments, peer feedback and other collaborative activities. To create a group self-selection activity, first set up groups and groupings.
- From the Groups page, select Auto-create groups.
- In the Group member settings, for Allocate members, select No allocation. This allows students to choose their own groups with the group self-selection activity.
- Once you have set up the groups and grouping you want your students to choose from, create your Group self-selection activity.
Note: If you want students to create their own groups, you can create an empty grouping without any groups.
For more information on how to set up groups and groupings, see Groups and groupings in Moodle.
Add a Group self-selection activity
- In the top right hand corner of the page, switch Edit mode to ON(Blue).

- In the section where you would like to add a resource or activity, click +Add an activity or resource.

Note: You can add new resources or activities above or below any existing activities or resources.
- Select Group self-selection and click Add.
- Give your activity a name. For example ‘Choose your group for the group presentation'.
- Enter a description. For example some information about the activity that will be linked to the self-selected groups. You may also include the following instructions for students:
- Optionally, specify a start and end date for your group self-selection activity. Students will be able to enrol and un-enrol themselves from the groups while the activity is available.
- From the Select groups from grouping drop down list, you can select the Grouping you previously created, or leave this on All groups.
- Specify the:
- Maximum number of students per group.
- Minimum number of students per group
- Number of groups a student must join to participate in the activity. If set to 0, participation in no groups is possible.
- In the General permissions, you can use the check boxes, choose whether participants are able to:
- Join or Leave groups
- Create groups
- Set the name of new groups
- Set and edit group descriptions
- Set passwords for joining groups
By default, participants can join, leave and create groups.
- In the Miscellaneous settings, you can choose to Assign supervisors to groups using the check box. Define the type of supervisor role using the drop down list. If supervisors are assigned, you can choose to Show assigned supervisors.
- You can also choose to:
- Hide full groups from the main view
- Show message, if the open until date is reached
- Delete group when last participant leaves
By default, A message will appear when the ‘open until date’ is reached and groups are deleted when the last participant leaves.
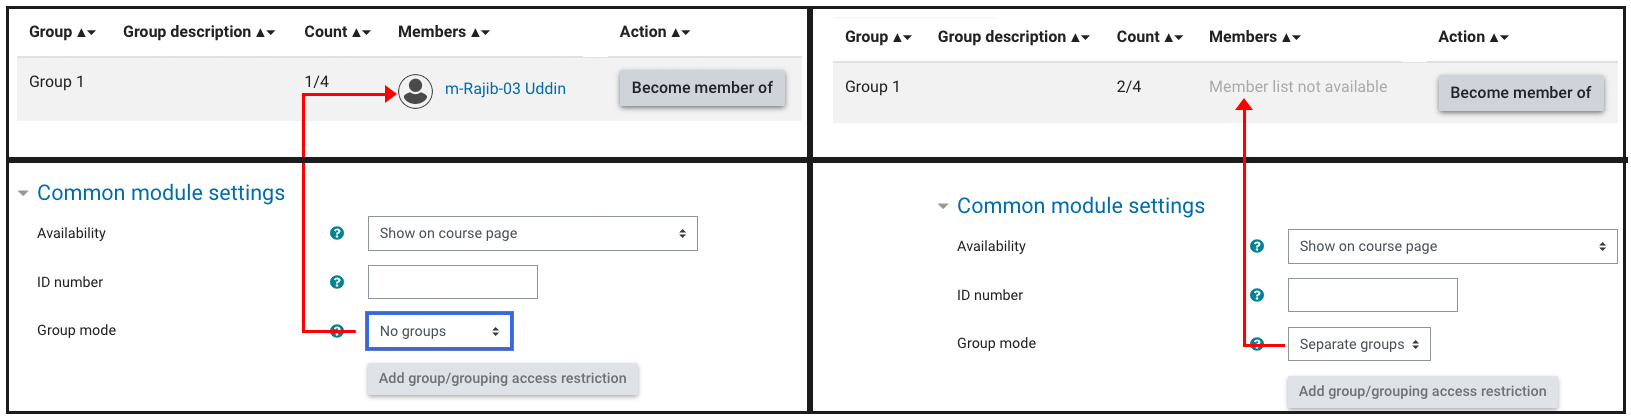
- In the Common module settings, the default Group mode is set to No groups. This means the existing members in a group are visible to students before they have made their group selection(shown in left). If you do not want existing group members to be visible to students, you can select Separate groups from the Group mode drop down options(shown in right).
- Once finished, click Save and return to unit.
To join a group, click Become member of button for the group you would like to join.
Click on the tabs below to view the Group self-selection activity from lecturer or student view
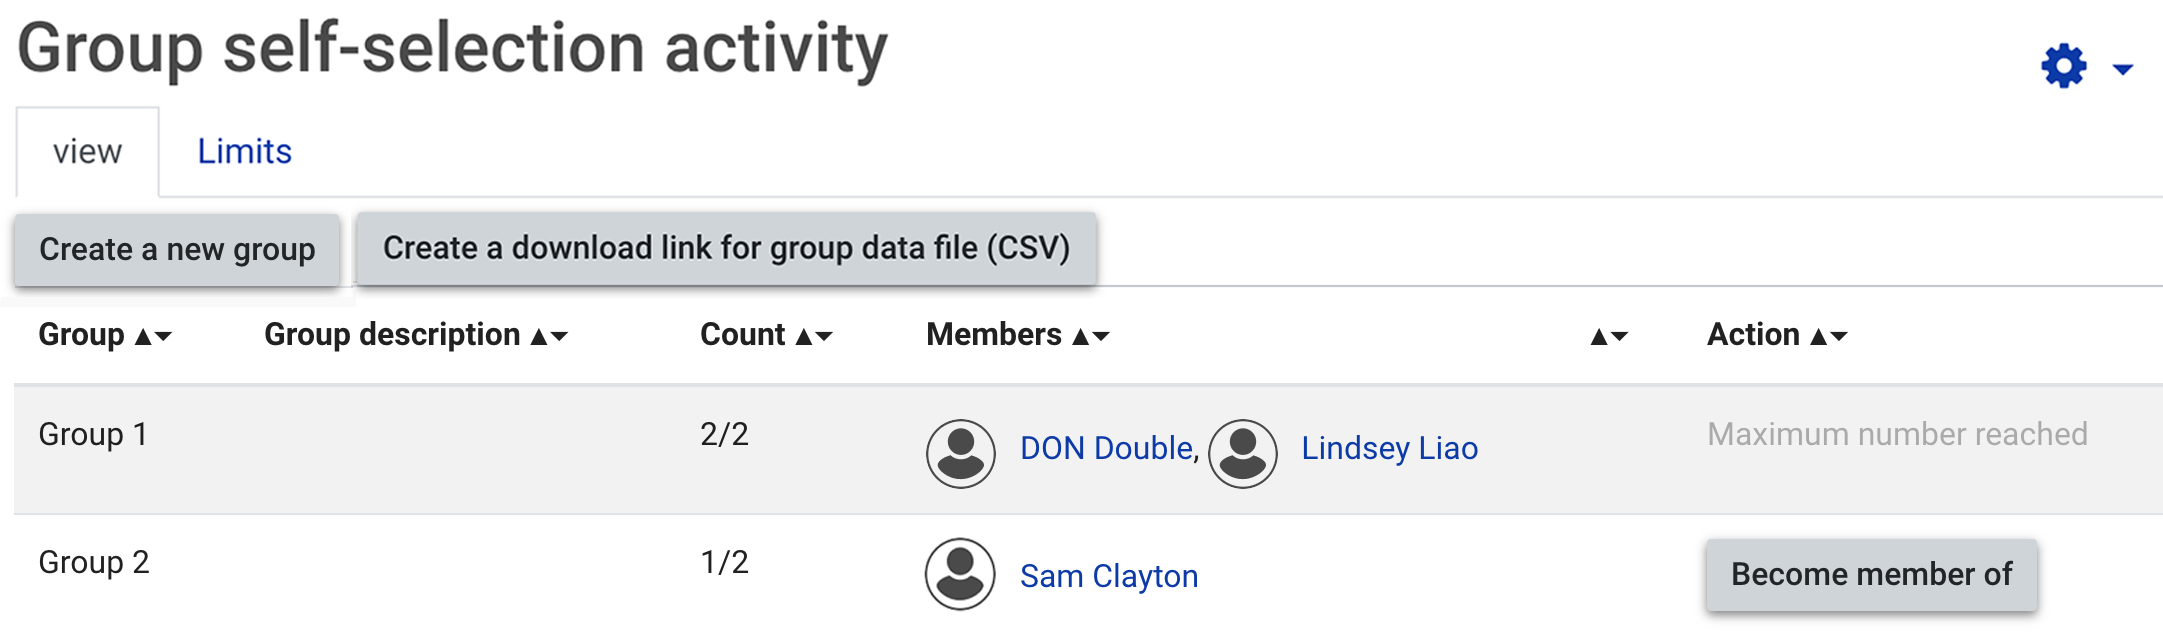
View tab
- Download button for group data (CSV)
- List of groups
- Group description, if provided.
- Create group button if this option has been enabled. You can turn this off in the activity general permissions settings.
- Current group member count
- Members in each group.
Limits tab
You can redefine the maximum number of members per group.
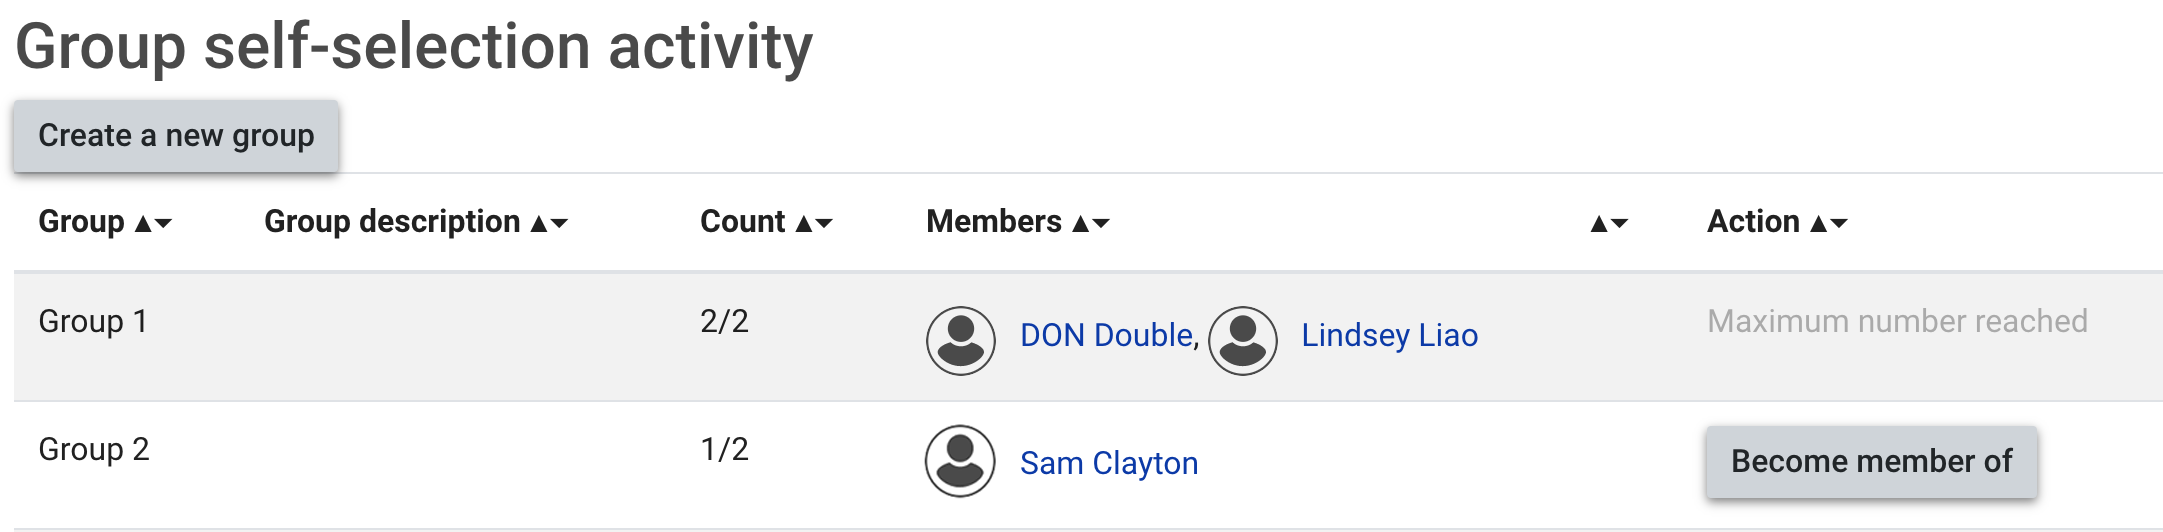
The Group self-selection activity will display:
- List of groups
- Group description, if provided.
- Create a new group button if this option has been enabled. You can turn this off in the activity general permissions settings.
- Current group member count
- Members in each group. You can change this setting in the common module settings so students can not see group members.
Instructions for students
You may wish to provide the following instructions for students. Highlight the text and copy it with CTRL+C(PC) or ⌘+C(MAC) and paste it into the group self-selection activity description field with CTRL+P(PC) or ⌘+P(MAC), then click Save and display.
To join a group, click the Become member of button for the group you would like to join.