Use Poll Everywhere
The advanced functionality of Poll Everywhere is great for users who want to expand the possibilities of in-class polling. Benefits include seamless PowerPoint/Google Slides integration and users can choose from these question types:
- Multiple choice
- Word cloud
- Up-vote down-vote
- Rank order
- Open ended question
- Clickable image
Start building in Poll Everywhere
Expand the accordion below for instructions. During the transition process, additional guidance will be added.
 Create a Poll everywhere question
View
Create a Poll everywhere question
View

Create a Poll Everywhere question (activity)
In Poll Everywhere questions are referred to as ‘activities’.
- Navigate to the Activities page.
- To create a question, click the +Activity button.
- Select the type of question you would like to create. You can choose from the main 7 activities (Multiple choice, Word cloud, Q&A, etc.) or click More to view additional question templates.
Click on the plus icons below to learn more about each of the main activity types and suggestions of how they can be used. Expand the accordions below for instructions to set up the main activity types.
-
Ask a question and let participants choose from a list of answers.
Watch the video or review the instructions below to learn how to create a multiple choice question in PollEverywhere
- Select Multiple Choice.
- In the Activity title field, enter your question or prompt (255 character limit).
- Below the activity title, enter options you want students to select from. This can be text (255 character limit), images or LaTeX code.
Note: For images, you can copy and paste a direct link or click on the Picture icon to upload an image from your computer.
- To add more response options, click + Add Option on the bottom left.
- To delete options, click the Trash icon on the right of the option you wish to delete.
- To rearrange the order of the options, click and drag the 6 dots on the left side of your options.
- To designate correct response(s) to a Multiple choice Activity, click on the tick icon to the left of the correct response option(s). The correct response will be highlighted green. You can click the tick icon again to unselect a correct answer.
Note: You can select multiple correct answers. You can also choose to set no correct answers, however this is not recommended.
- When finished, click Create.
Note: If you would like to create a set of multiple questions, you can use the Presentation feedback template under More.
-
Word clouds allow students to provide single words in response to a question or prompt. Audience responses are displayed as a dynamic word cloud.
Watch the video or review the instructions below to learn how to create a word cloud activity in PollEverywhere
- Select Word cloud.
- In the activity title field, enter a question or prompt (255 characters limit). You can use an image as your prompt by pasting a direct link or uploading one from your computer by clicking on the Picture icon.
- When finished, click Create.
Note: While it recommended to ask participants to respond with one-word answers, participants can respond with sentences if they include an underscore between each word of the sentence, for example: this_is_an_example_sentence_response
-
Participants respond to a question or prompt, then can upvote and downvote other answers. This type of activity is useful for gathering consensus. For example, you could ask students what they struggled with during the week, you could then address the points that students struggled with the most, indicated by most up-voted.
Watch the video or review the instructions below to learn how to create a Q&A activity in PollEverywhere
- Select Q&A.
- In the activity title field, enter a question or prompt (255 characters limit).
- When finished, click Create.
-
You can upload an image, with an attached prompt. Student can then click anywhere on the image to respond, and you will be able to view a distribution 'heat map' of where students clicked on the image.
- Select Clickable image.
- In the activity title field, enter a question or prompt (255 characters limit).
- You can choose to upload your own image from your computed or select a template from the options provided (scroll down to view all the options):
- World map
- Emotion scale
- X/Y axis
- Map of the United states
- Female anatomy diagram
- Male anatomy diagram
- Colour gradient
- Periodic table
- 2x2 matrix (click More in the Activity type options to view this template.)
- To upload your own image, click Upload your own image.
- When finished, click Create.
-
Surveys allow you to ask your participants multiple questions at once. Everyone can answer the questions privately at their own pace. Surveys are great for quizzes, pre- and post-training assessments, and questionnaires.
Note: Surveys and groups can be edited after the creation process.
- Select Survey.
- In the Activity title field, give your survey a name.
- You can use the drop down list on the left to change the question type to:
- Multiple choice
- Word cloud
- Q&A
- Clickable image
- Open ended text
- Ranking
- In the title field for each multiple choice question, enter your question or prompt (255 character limit).
- Enter options you want students to select from. This can be text (255 character limit), images or LaTeX code.
Note: For images, you can copy and paste a direct link or click on the Picture icon to upload an image from your computer.
- To add more response options, click + Add Option on the bottom left.
- To delete options, click the Trash icon on the right of the option you wish to delete.
- To rearrange the order of the options, click and drag the 6 dots on the left side of your options.
- To designate correct response(s) to a Multiple choice Activity, click on the tick icon to the left of the correct response option(s). The correct response will be highlighted green. You can click the tick icon again to unselect a correct answer.
Note: You can select multiple correct answers. At least one correct answer must be selected.
- To add additional multiple choice questions, click +Add another question.
- When finished, click Create.
-
Ask a question and let participants type in a free-form text answer.
- Select Open-ended.
- In the activity title field, enter a question or prompt (255 characters limit). You can use an image as your prompt by pasting a direct link or uploading one from your computer by clicking on the Picture icon.
- When finished, click Create.
-
Competitions are a series of multiple choice activities. Students are assigned scores based on how fast they answer the question. At the end of the competition activity, a leaderboard displays which students answer correctly the fastest.
- Select Competition.
- In the Activity title field, give your competition a name.
- In the title field for each multiple choice question, enter your question or prompt (255 character limit).
- Enter options you want students to select from. This can be text (255 character limit), images or LaTeX code.
Note: For images, you can copy and paste a direct link or click on the Picture icon to upload an image from your computer.
- To add more response options, click + Add Option on the bottom left.
- To delete options, click the Trash icon on the right of the option you wish to delete.
- To rearrange the order of the options, click and drag the 6 dots on the left side of your options.
- To designate correct response(s) to a Multiple choice Activity, click on the tick icon to the left of the correct response option(s). The correct response will be highlighted green. You can click the tick icon again to unselect a correct answer.
Note: You can select multiple correct answers. At least one correct answer must be selected.
- To add additional multiple choice questions, click +Add another question.
- When finished, click Create.
-
The ranking type activity lets students arrange a list of answers into a ranked order.
- Click More on the right of the activity type selection menu, additional question template types will appear.
- Select Ranking.
- In the Activity title field, enter your question or prompt (255 character limit).
- Below the activity title, enter options you want students to select from. This can be text (255 character limit), images or LaTeX code.
Note: For images, you can copy and paste a direct link or click on the Picture icon to upload an image from your computer.
- To add more response options, click + Add Option on the bottom left.
- To delete options, click the Trash icon on the right of the option you wish to delete.
- To rearrange the order of the options, click and drag the 6 dots on the left side of your options.
- When finished, click Create.
 Import questions using a .csv file
View
Import questions using a .csv file
View
You can use a CSV file to quickly create or import the following activity types into Poll Everywhere:
- Multiple choice
- Open-ended
- Ranking
- Word Cloud
- Q&A
- Surveys
- Competitions
Note: You cannot upload images with the CSV importer. This means you cannot use this method to create an activity that relies on images such as Clickable image or multiple choice activities that use the image as the response option.
Watch the video or read the instructions below
- Navigate to the Activities page.
- Click Upload.
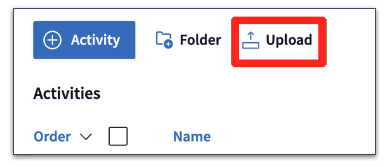
- You can either drag and drop your CSV file or click Choose file to select your file. You can also click Download our CSV template to download a blank template file.
Note: When activities are uploaded, they get placed into a folder. Currently, the Poll Everywhere folder limits items to 400. The maximum number of activities you can upload at once is 400, however it is recommended that you upload 100 activities or less at one time.
- In your .CSV file, each row will be imported as a distinct question and will be converted into an individual activity in your account. Review your data to ensure that:
- Titles are not blank and do not exceed the 255 character limit
- Multiple Choice options are not blank and do not exceed the 255 character limit
- Special characters are excluded as they may cause issues during the import
Note: Images cannot be uploaded using the CSV importer. Once questions have been imported, you can then add images for multiple choice activities.
Click on the plus icons to learn more about each column of an example CSV file template
-
Column A Activity. For individual questions, this will be “Poll”. For Surveys and Competitions, this will be “Survey” and “Competition”. For the questions within Surveys and Competitions, you will need to enter "Survey Poll" and "Competition Poll". Column B Type. The valid activity types are:
- Multiple choice
- Open-ended
- Rank order
- Q&A
- Word cloud
Column C Title. This is where to enter your question (e.g. “What is the answer to life, the universe, and everything?”). For Surveys and Competition, this is the title of the activity. Columns D onward Option. These fields to used to enter response options for multiple choice and rank order questions. For all other question types, leave the fields blank.
To designate a correct answer for multiple choice questions, place three asterisks before the answer.
- Once your .CSV file has been uploaded, click Continue.
- Review your imported activities. Make any adjustments to the CSV file and re-upload the file if needed.
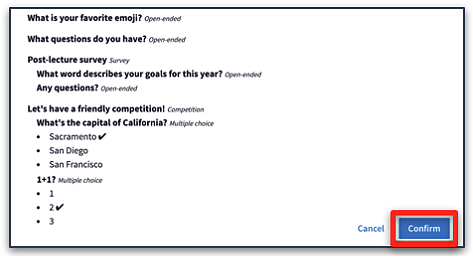
- When finished, click Confirm to complete the import.
- Once the import has been completed, you will receive a notification of successful import and have the option to access the imported activities. The imported activities will be listed in a folder with a label starting with “Imported” followed by the timestamp it was imported.
 Integrate Poll Everywhere with Moodle
View
Integrate Poll Everywhere with Moodle
View
You can use the Poll Everywhere external tool to sync your Moodle with PollEverywhere. Once synced, you can use the Course Management features to:
- Manage student rosters, organise content, and sync seamlessly with your Moodle.
- See how each student has responded to your polls activities.
- Track and reward student engagement with points-based and percentage-based scoring. These will appear in your Moodle grader report as two separate grade columns for Participation and Correctness, if enabled.
- Sync rosters and grades manually or set up automatic syncs.
- Set start and end dates of course activities which allows you to reuse polls or activities across semesters but ensure only current-term student responses and participation are included in LMS grade sync.
Expand the accordions to learn more
-
- In Moodle, navigate to the unit that you would like to integrate with Poll Everywhere.
- In the top right hand corner of the page, switch Edit mode to ON(Blue).

- In the section where you would like to add Poll Everywhere, click +Add an activity or resource.

Note: The external tool will be hidden from students.
- Select PollEverywhere.
- Students will not access polls via the external tool so it is recommended that you hide the external tool activity. In the Common module settings section, ensure that the Availability is set to Hide on course page.

- Click Save and display.
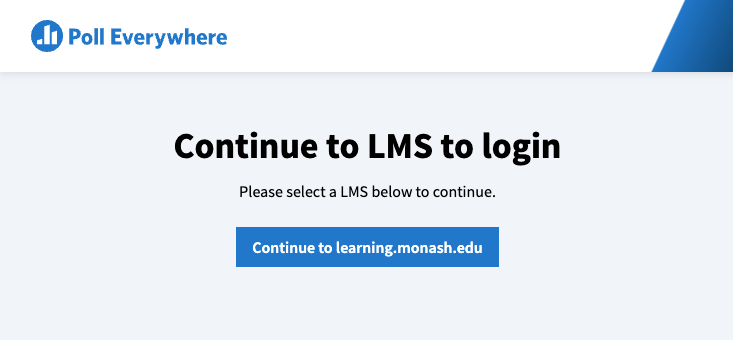
- Click the Open in new window link. This will automatically open the Poll Everywhere website in new window.
- Click Continue to learning.monash.edu to continue.
- Click on Sync Roster. The Sync Roster icon will become grey and spin while Poll Everywhere syncs with your Moodle unit.
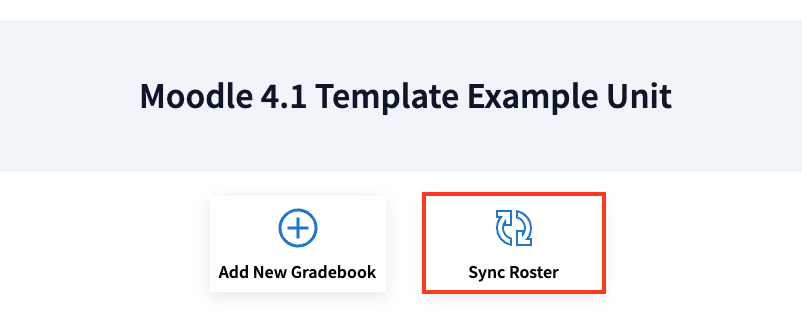
- Once the Sync Roster icon becomes blue again, your Moodle unit participants have been synced. Students will receive an email that they have been invited to connect with Poll Everywhere.
- Click on the Participants icon in the menu on the left hand side of the screen to view all synced participants. If you have made changes to your participant list in Moodle since you first synced your roster, you can update your participants rosters from the Participants page.
Click on the plus icons below to learn more about the participants page
-
An “Assignment” is a group of Poll Everywhere activities similar to how a quiz contains multiple questions. If enabled, the students “grade” (based on correctness or participation) will appear in your Moodle grader report as a grade column.
Watch the video below to get started
- Click on the course icon in the left hand navigation menu to navigate to the courses landing page.
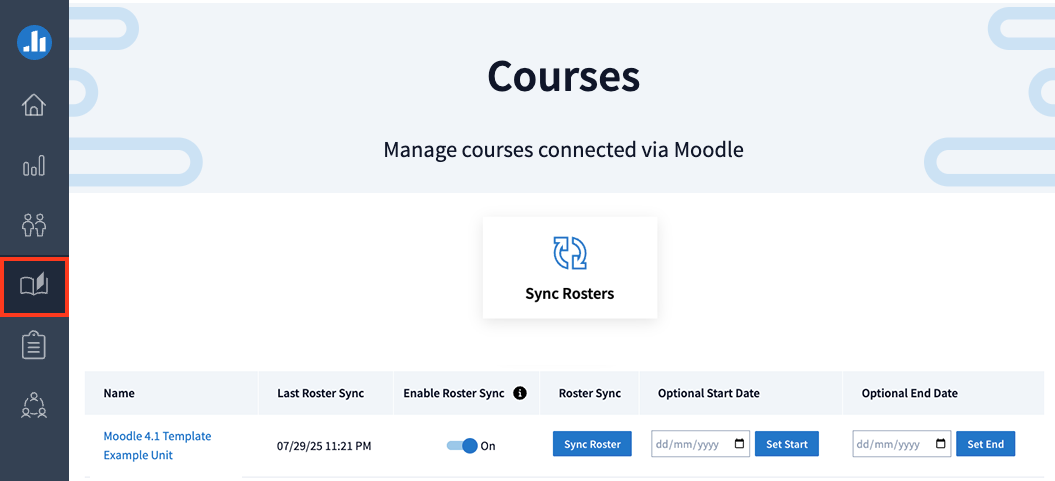
- From the Courses page, you can sync enrolments and add an optional start and end dates. Adding start and end dates allows you to filters LMS-synced assignment responses based on when they were submitted. This can be useful if you:
- Reuse polls or activities across semesters.
- Want to ensure only current-term student responses are included in LMS grade sync.
- Want to manage participation without managing poll-level settings.
- To set the optional course dates, enter a start date, end date, or both. Then click Set Start and/or Set End to save changes.
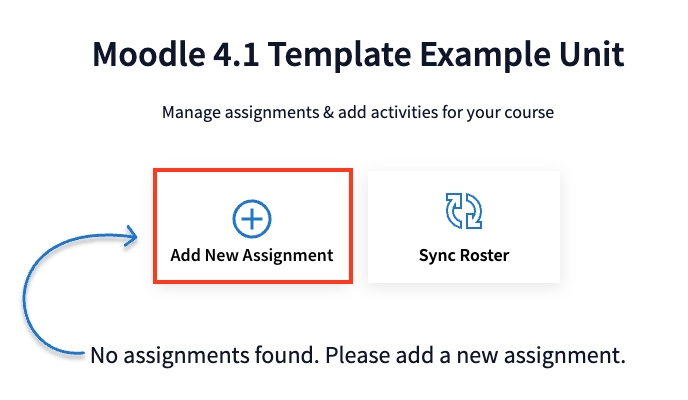
- Click on the unit name to navigate to the Moodle unit’s course page.

- Click Add New Assignment.
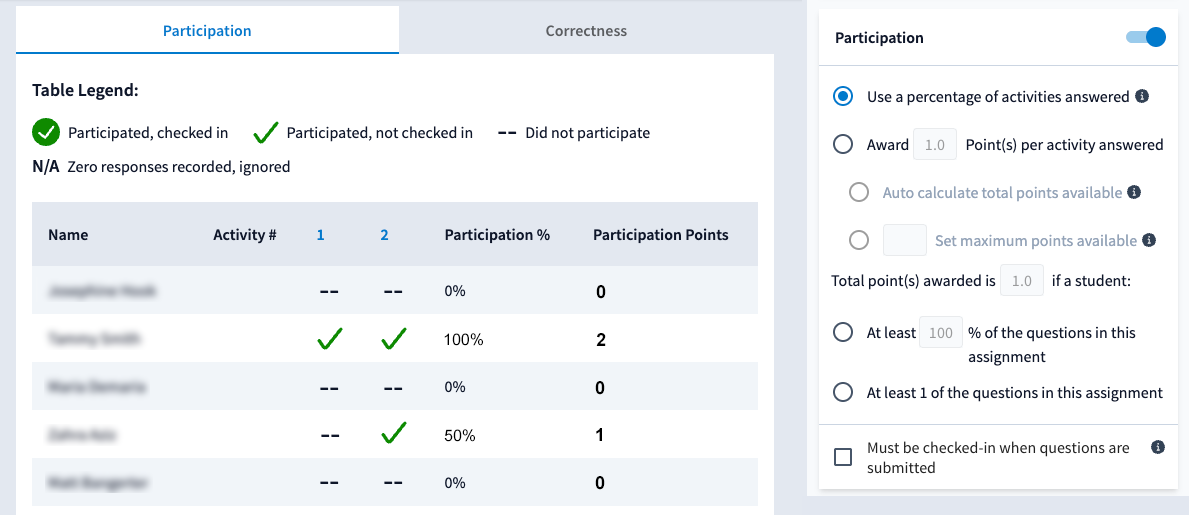
- Enter the assignment name and configure the participation and/or the correctness requirements. You can choose either or both grading types:
- Participation: Points for attempting activities
- Correctness: Points for answering correctly
For more information, see Understanding Participation and Correctness Grading Options.
Note: You can't save until you enter the "Assignment Name." However, you can save the assignment name without activating participation or correctness. This can be configured later.
- Click Save.
- The new assignment will appear on your Moodle unit’s course page.
- Under the Activities column, click +Add Activity.

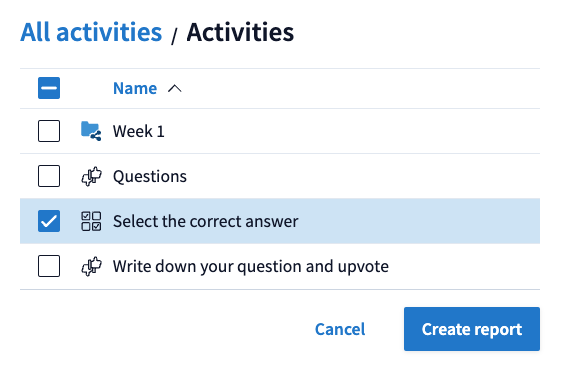
- Any existing PollEverywhere activities you have created will be displayed in the side panel.
- Select activities by selecting the checkboxes. Selecting the checkbox for Name will select all visible activities (activities inside folders will not be selected).
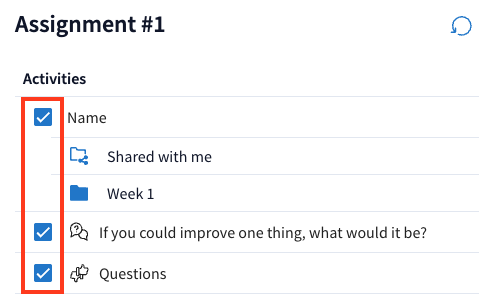
- You can also create new activities from the side pane. For more information, see Create a Poll Everywhere question. If you create new activities, click the refresh icon in the top right corner to update the activity list. Newly added activities should now appear and can be selected with the checkboxes.
- Once all activities have been selected, click Save.
- In the Activities column, you will see the number of poll activities assigned to each assignment. You can click on the link under the activities column to open the side pain to review assigned activities and add or remove activities.

- To remove activities from the assignment, click the X icon beside the activity name.
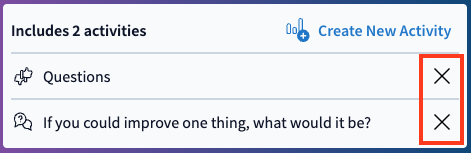
Note: This will not delete the activity in Poll Everywhere, just remove it from the assignment.
- Click Save to save your changes.
Note: When navigating through nested folders, breadcrumbs will appear at the top of the screen, allowing you to easily backtrack to previous folder levels. If there are multiple subfolders, the breadcrumbs will display them for quick navigation. If subfolders exist, a drop-down appears to help navigate through multiple layers of activities. The master Activities folder will always be visible for easy navigation.
- Click on the course icon in the left hand navigation menu to navigate to the courses landing page.
-
- From your Moodle unit page, in the Preview Grades column, click on View Grades for the assignment.

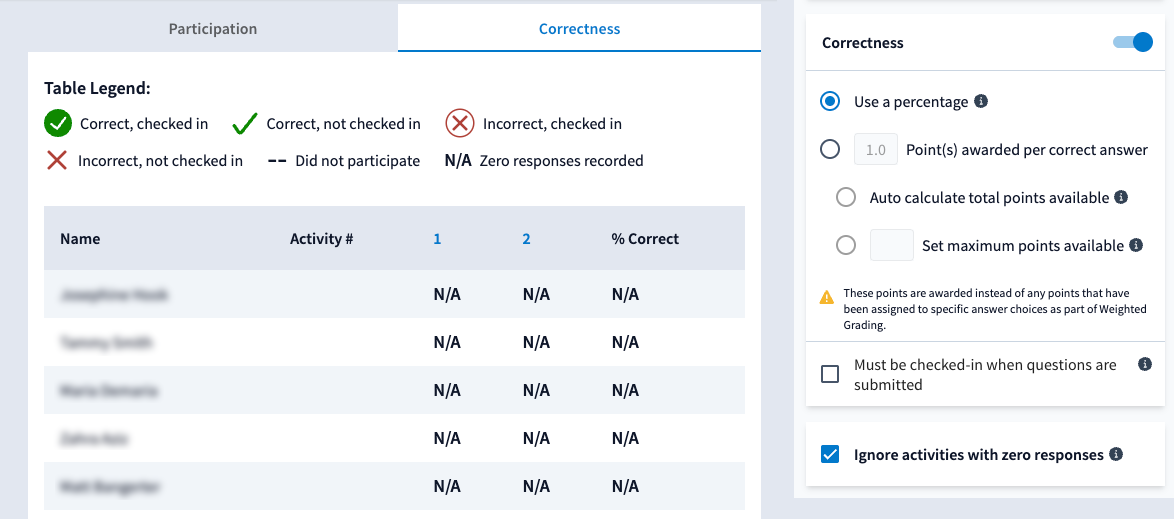
- This will open a page that displays participation and/or correctness settings as tabs, if enabled. Toggle between tabs to view the respective settings. The right hand side panel allows you to toggle on/off participation and correctness setting. Click Update to apply any changes.
Click on the tabs to view an example of the participation and correctness pages
Sync grades
- To sync grades, click the Sync Grades button for the assignment to start the synchronisation process.

Note: "Sync Grades" becomes active when activities are in the assignment, and will only appear after grading options (participation and correctness) have been configured and saved.
- From your Moodle unit page, in the Preview Grades column, click on View Grades for the assignment.
-
You can delete Moodle-synced assignments directly within Poll Everywhere. This prevents confusion when assignments are removed from Moodle but still show in PollEverywhere.
To delete a synced assignment:
- Navigate to your Course Management page.
- Click on the name of the Moodle unit.
- In the Delete Assignment column, click the Delete button.

- A confirmation prompt will appear, informing you:
- Deletion is permanent and cannot be undone.
- This action does NOT affect the assignment in Moodle.
- Confirm deletion.
- Navigate to your Course Management page.
 Share polls with your teaching team
View
Share polls with your teaching team
View
Your faculty administrator (Team lead) can set up teams on your behalf on request. Once the team has been created, you may be assigned the Team Manager or Presenter role.
| Role | Description |
|---|---|
| Presenter | You can create and present activities, and share them with any teams you are a member of. Shared polls can be presented by any member of the team but can only be edited by the activity owner. You can run reports on Shared activities. |
| Team manager | In addition to the above, you can also add/remove members to your team. Note: If you leave the team, you will no longer be able to see or make changes to the team. |
Expand the accordion below for a detailed list of each role
-
Presenter - Respond to unregistered activities
- See your own response history
- Respond to registered-only activities
- Present activities (collect responses)
- Create and configure activities for yourself
- Run your reports on activities you made
- Share activities with others on your team
- Send copy of your activities to anyone in the account
- Run reports for others in your team (shared only)
Team Manager - All of the capabilities listed above
- Add/remove members in a team
- Change "presentation" settings for activities shared with team (clear and reset)
Note: If you leave the team, you will no longer be able to see or make changes to the team.
Team Lead only - All of the capabilities listed above
- Create a team (PollEverywhere guide)
Note: If you leave the team, you will no longer be able to see or make changes to the team.
Watch the video below to learn about the different ways you can share Poll everywhere activities
Note: Click the ^ arrow at the bottom of the screen to view the table of contents. Click on a topic to skip directly to that section of the video.
Expand the accordions below to learn more
-
- Navigate to the Poll Everywhere Teams page.
- You will see a list of all teams you are a member of. If you do not have any teams, contact your faculty administrator to assist you in setting up a team.
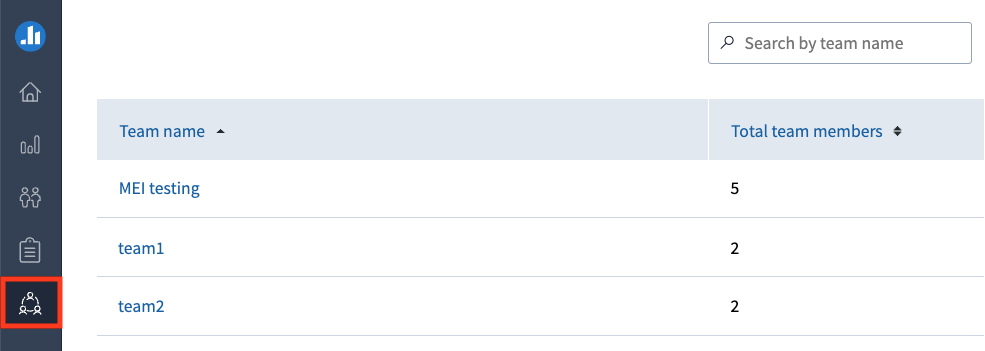
- Click the team name to view a list of members within that team.
- If you have been assigned as a Team Manager, you will be able to add members by clicking the Add members button.
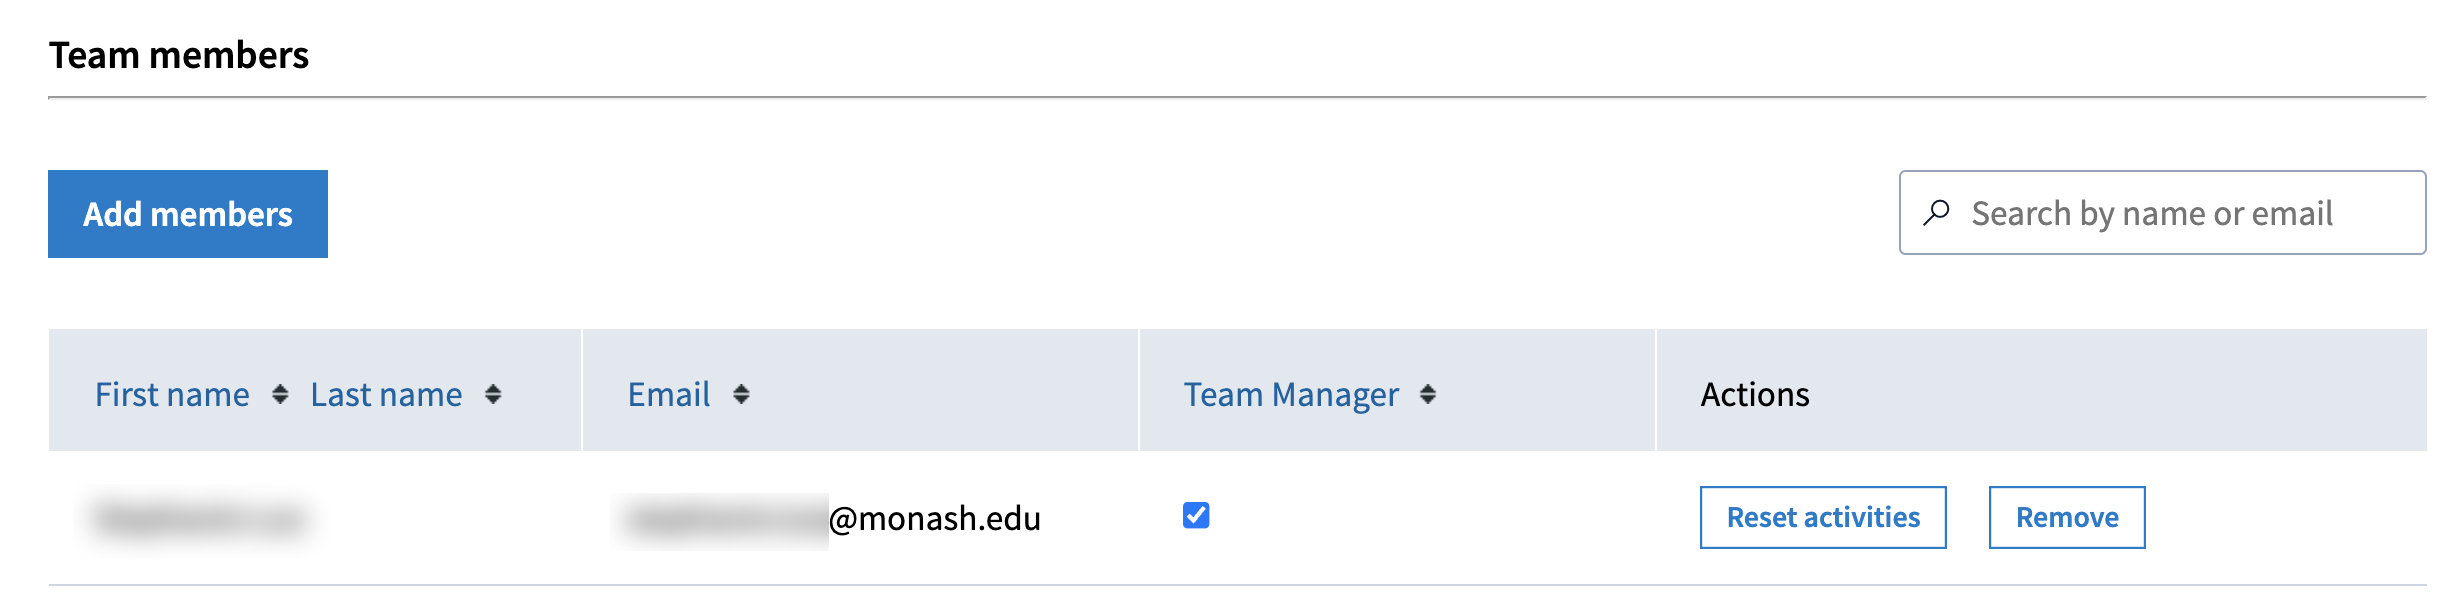
- Search for users you would like to add as team members by name or email.
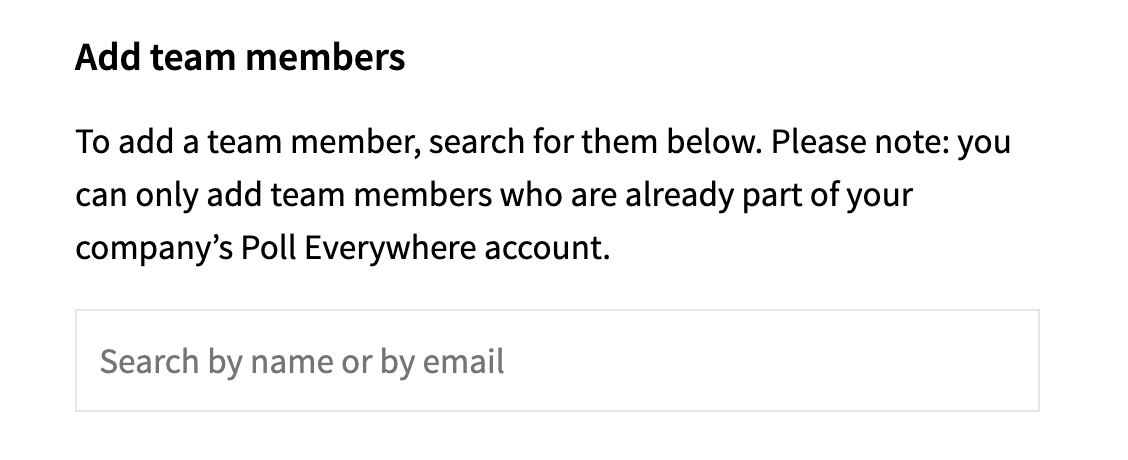
- Once finished, click Save.
-
- Navigate to the Activities page.
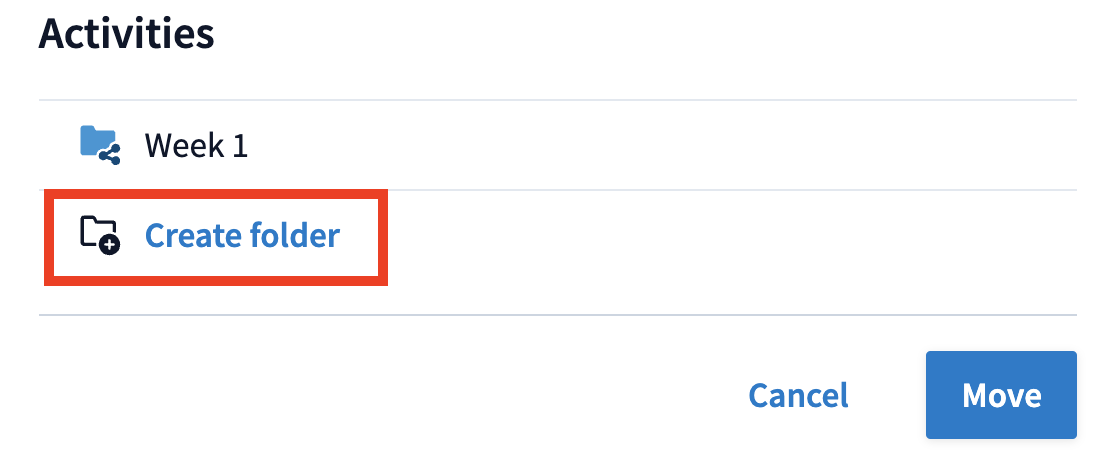
- Select activities that you would like to share with selection checkbox, then select Move.

- You can move your activities into an existing folder or select Create folder, then click Move.
- Select the folder with the selection checkbox, then click on the three dots and select Share from the options.

Note: Only folders can be shared with teams. Ensure that you first put poll activities that you would like to share inside a folder.
- You can select one or more teams to share your activities with.
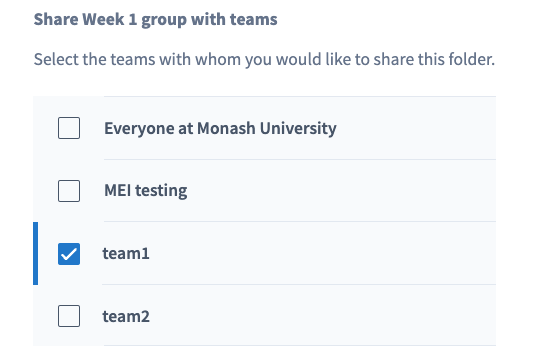
- Once selected, click Save.
- The activities in your folder will now be shared with your selected teams and the folder icon will display with a share icon in the corner.

Note: Polls that have been shared can be presented by anyone in the team, but can only be edited by the original owner of the activity.
-
You can send a copy of an activity to another Poll Everywhere user. This allows the other user to become the owner of the duplicate copy, allowing them to edit and make changes to the activity without making any changes to the original activity.
- Navigate to the Activities page.
- With the checkboxes, select an activity or a folder of activities you would like to send a copy.

- Select Send copy.
- Type in the name of an individual, or multiple individuals separated by a comma, then click Send.
- A copy of the activity will now be shared.
-
You can create a copy of any activities that have been shared with you. This allows you to become the owner of the duplicated activity, enabling you to edit and make changes to the activity without modifying the original activity.
- Navigate to the Shared with me page.
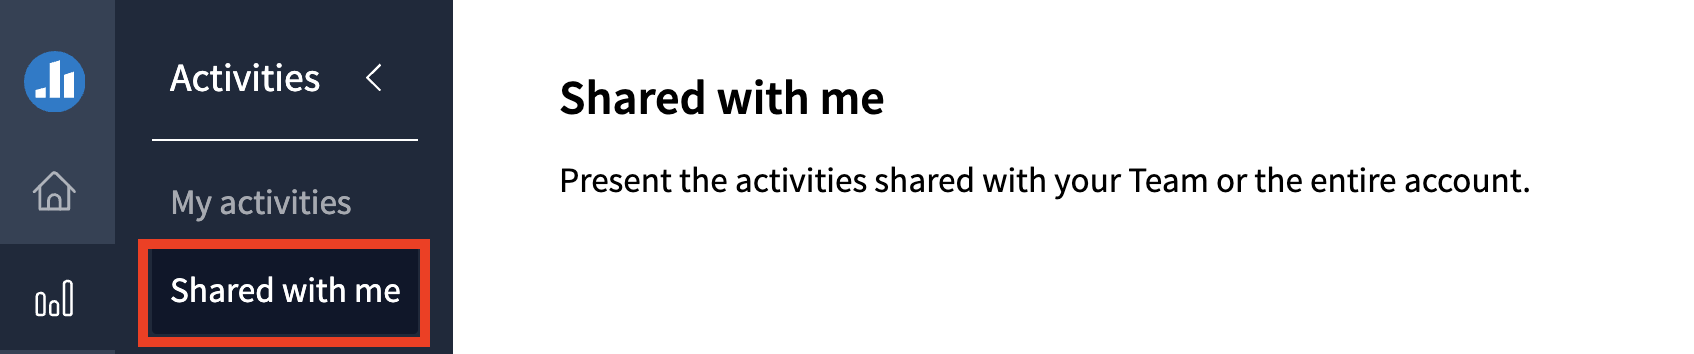
- Any Poll everywhere activities that have been shared with you will appear here.
- With the checkboxes, select an activity or a folder of activities you would like to copy.
- You can select a folder if desired. If you do not select a folder the selected activity will appear at the bottom of your activities page.
- Select Duplicate.
- Navigate to the Shared with me page.
-
You choose to transfer ownership of poll activities to another user. This will allow them to make changes and edit the poll activity, however you will lose access to the poll activity unless it is shared with you by the new owner.
- Navigate to the Activities page.
- With the checkboxes, select an activity or a folder of activities you would like to change owner for.
- Select Change owner.
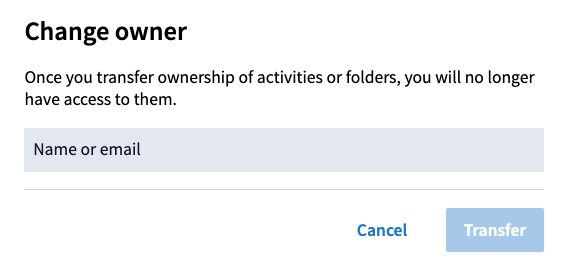
- Type in the name of an individual user, then click Transfer.
- You will see a notification to confirm the activity has been transferred and it will no longer appear on your activities page. You will no longer be able to access the poll activity unless it is shared with you.
- The transferred activity will appear on the new owner's activities page, inside a folder with your name and the date of transfer.
 Insert polls into presentation slides
View
Insert polls into presentation slides
View
Poll Everywhere's integration with Microsoft PowerPoint (Windows/MAC) and Google slides (Chrome/Edge) allow you to insert your Poll activities into your presentation slides. Your poll activities will automatically activate/deactivate as you go through your slides.
Note: You must present in full screen mode for the Poll Everywhere activities to activate.
Watch the video guide below to learn how to embed Poll Everywhere activities into presentation slides
Note: Click the ^ arrow at the bottom of the screen to view the table of contents. Click on a topic to skip directly to that section of the video.
Click through the tabs below for detailed instructions
- Navigate to the Poll Everywhere integrations page.
- Click Learn More for Poll Everywhere for PowerPoint (Windows).
- Click the Download for Windows button. Once downloaded, follow the prompts to install the Poll Everywhere app.
- Once the integration has successfully been installed, you should see Poll Everywhere in the top banner menu of PowerPoint.
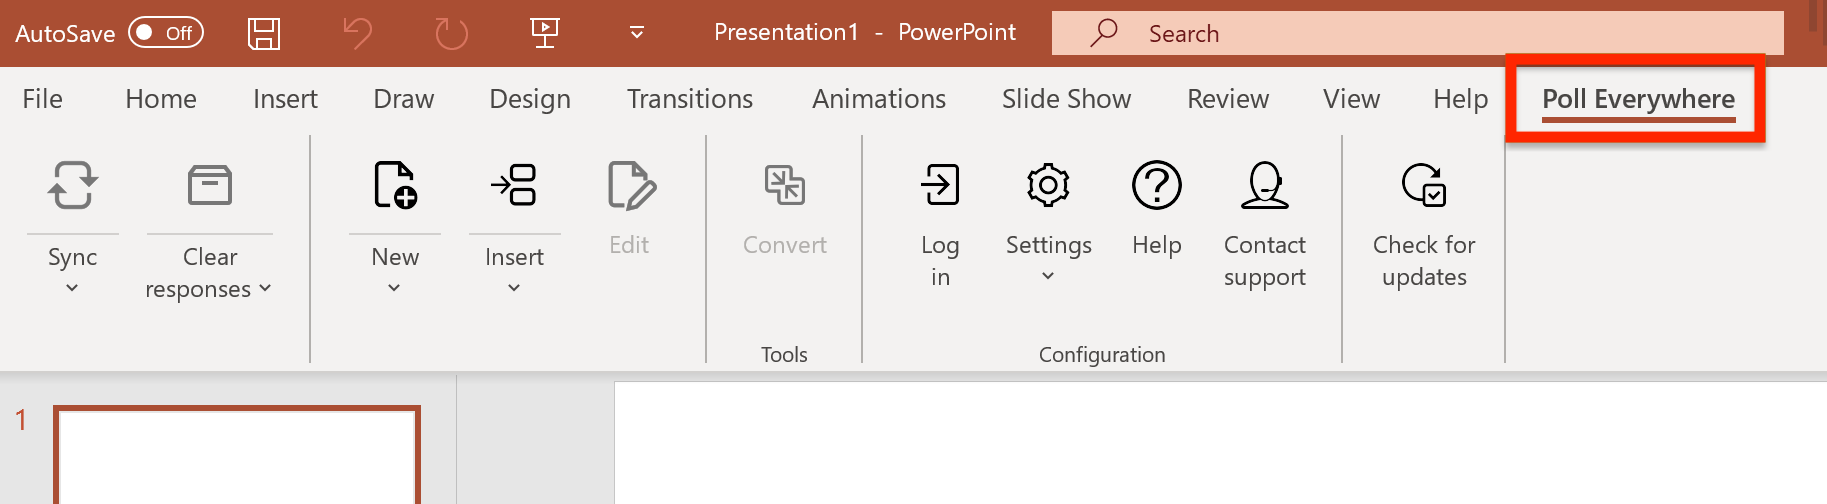
- Click on Poll Everywhere and then select Insert Activity.
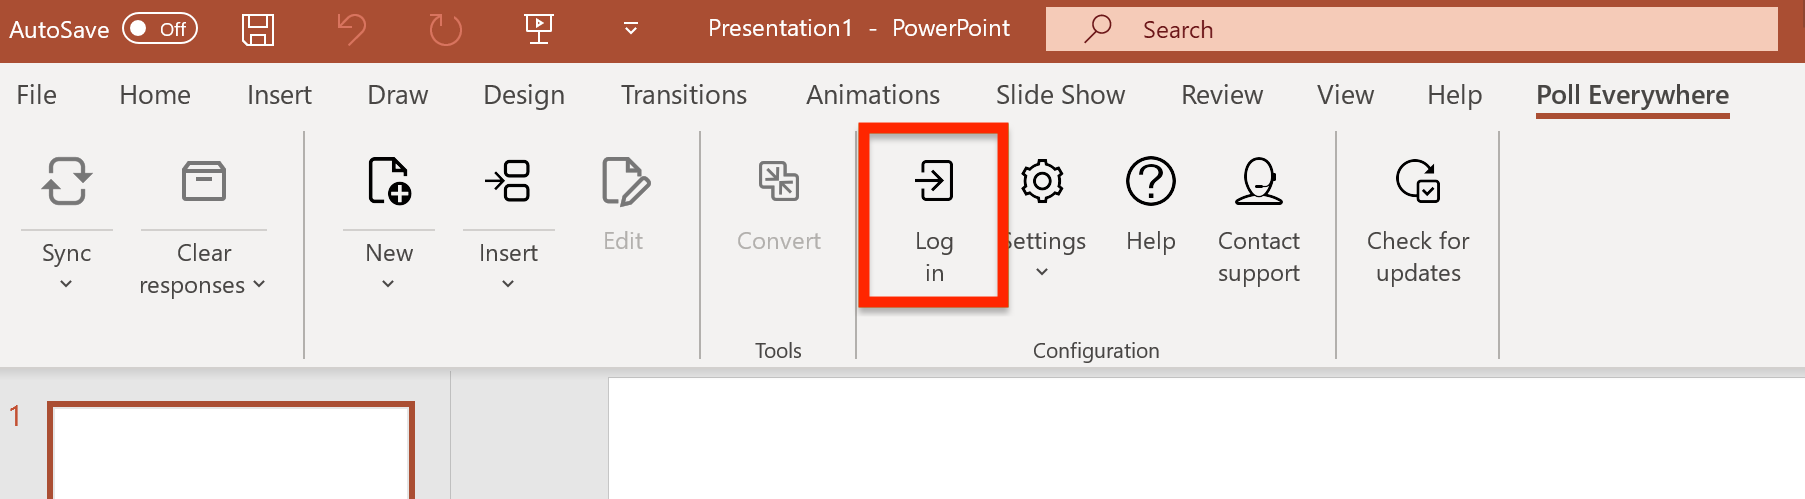
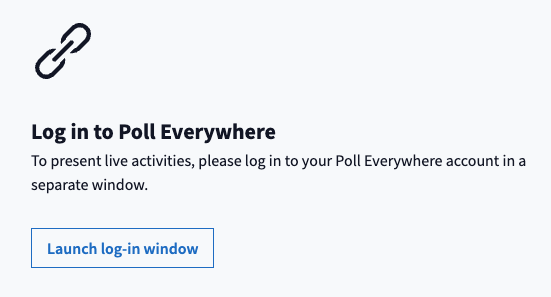
- First, click Log in to log into your Poll Everywhere account.
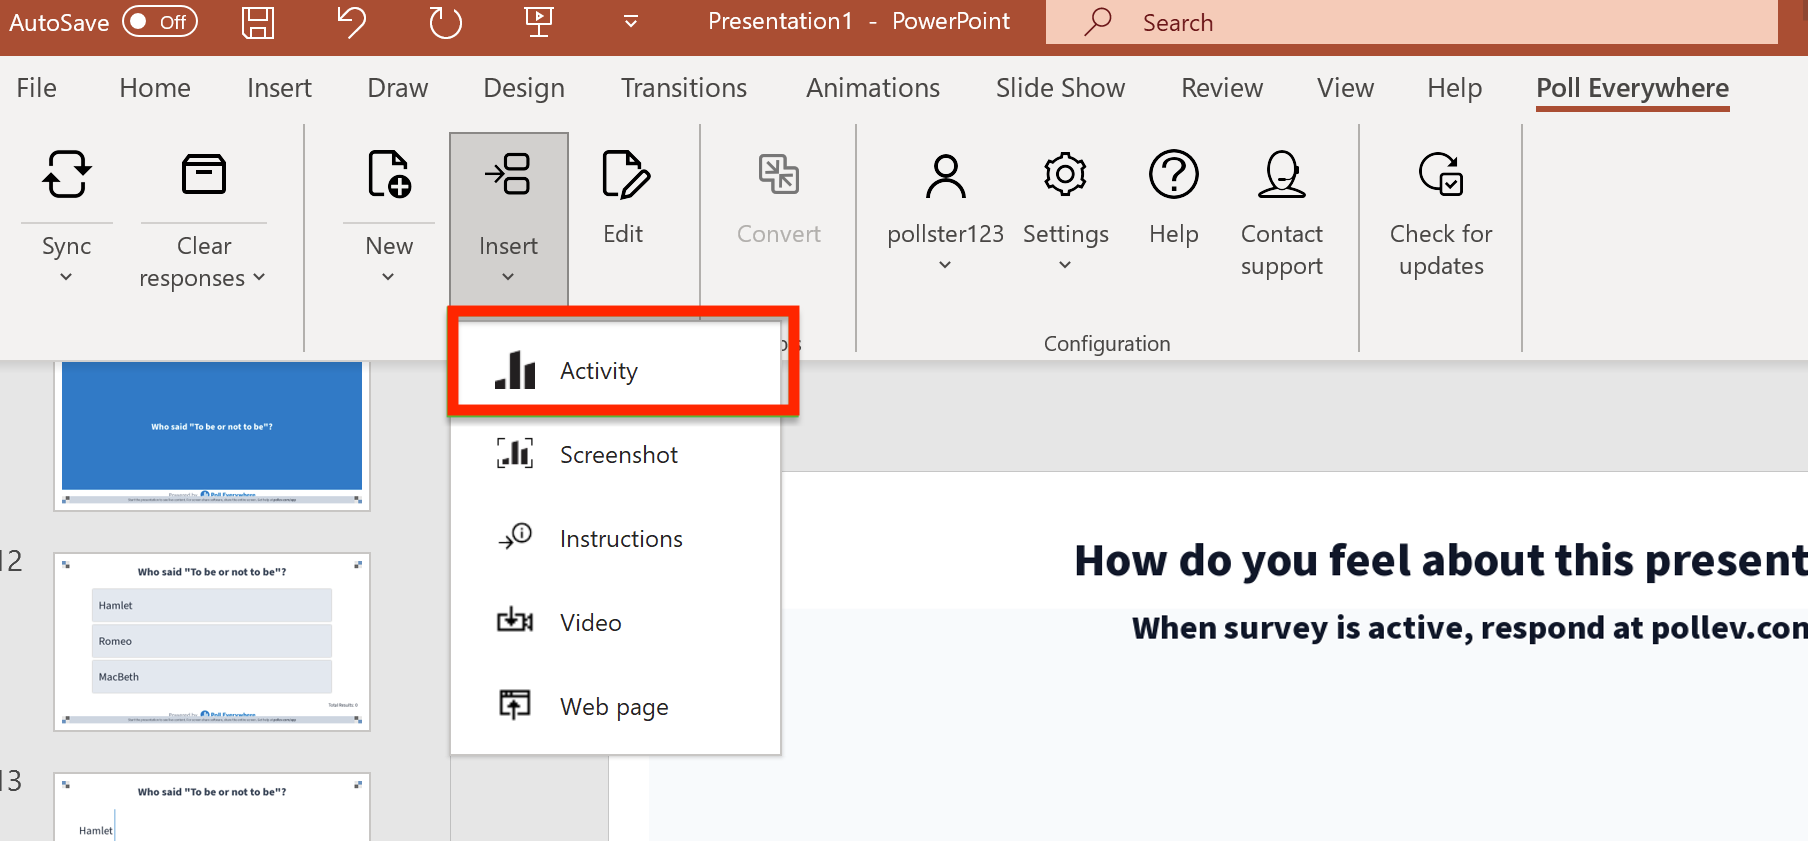
- Once logged in, click Insert and then select Activity. Your Poll everywhere activities will be displayed in a pop-up window.
- Use the checkboxes to select one or more poll activities that you would like to insert into your Powerpoint presentation.
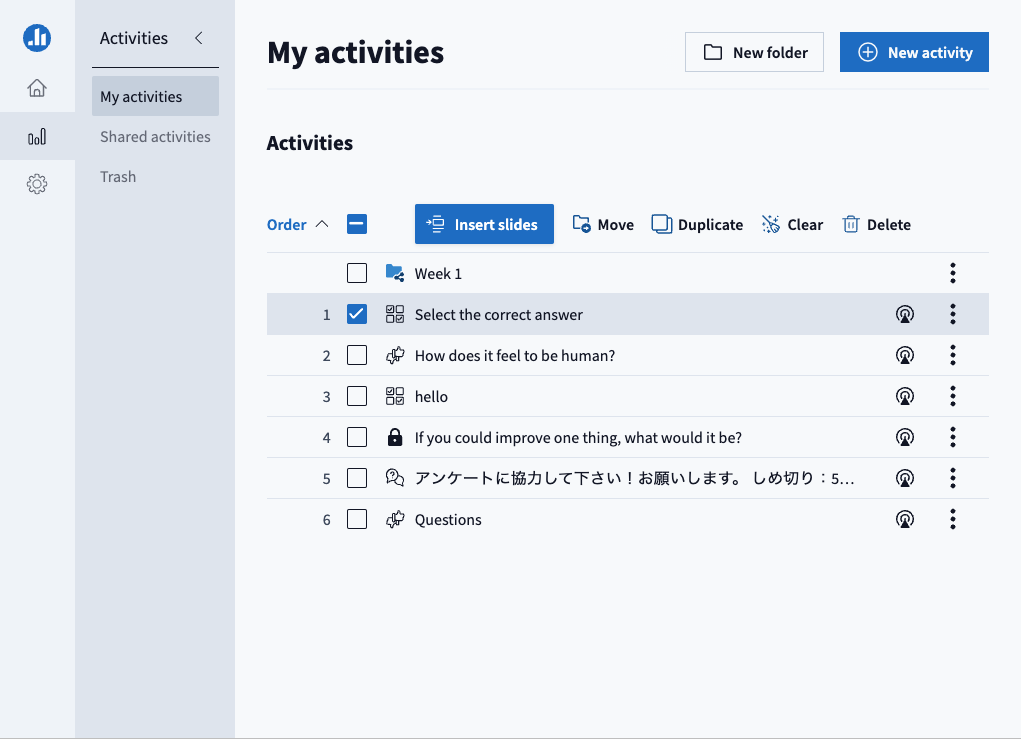
- Once selected, click Insert slides.

- You can choose the activity flow, then click Insert slides. The default activity flow displays the poll on a single slide, while presenting you have the option to lock and unlock the activity. The engagement flow displays the poll on three slides, which displays:
- a preview of the poll question
- the activated poll question
- the final results once the poll activity has been locked
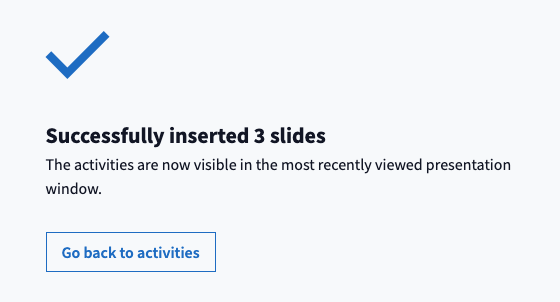
- Once inserted, you will see a successful confirmation message. You can click Go back to activities to insert additional poll activities or close the pop-up window to return to your PowerPoint presentation.
- When presenting your slides, the poll activity on the current slide will automatically activate/deactivate.
Note: You must present in full screen mode for the Poll Everywhere activities to activate.
- Navigate to the Poll Everywhere integrations page.
- Click Learn More for Poll Everywhere for PowerPoint (Mac).
- Click the Download for Mac button. Once downloaded, follow the prompts to install the Poll Everywhere app. You will need to allow permissions for the Poll Everywhere app to view your screen. This allows the integration to activate polls on your current PowerPoint slide.
- Once the integration has successfully been added to your Chrome browser, you should see Poll Everywhere in the top banner menu of Google slides.
- Open Microsoft PowerPoint and the Poll Everywhere app. You may be prompted to login into your Poll Everywhere account.
- Once logged in, your Poll everywhere activities will be displayed in the Poll everywhere app.
- Use the checkboxes to select one or more poll activities that you would like to insert into your PowerPoint slides.
- Once selected, click Insert slides.
- You can choose the activity flow, then click Insert slides. The default activity flow displays the poll on a single slide, while presenting you have the option to lock and unlock the activity. The engagement flow displays the poll on three slides, which displays:
- a preview of the poll question
- the activated poll question
- the final results once the poll activity has been locked
- Once inserted, you will see a successful confirmation message. You can click Go back to activities to insert additional poll activities or close the pop-up window to return to your Powerpoint presentation.
- When presenting your google slides, the poll activity on the current slide will automatically activate/deactivate.
Note: You must present in full screen mode for the Poll Everywhere activities to activate.
- Navigate to the Poll Everywhere integrations page.
- Click Learn More or Poll Everywhere for Google Slides (Chrome/Edge depending on your browser).
- Click the Add Chrome extension button.

- You will be redirected to the Chrome web store. Click the Add to Chrome button.
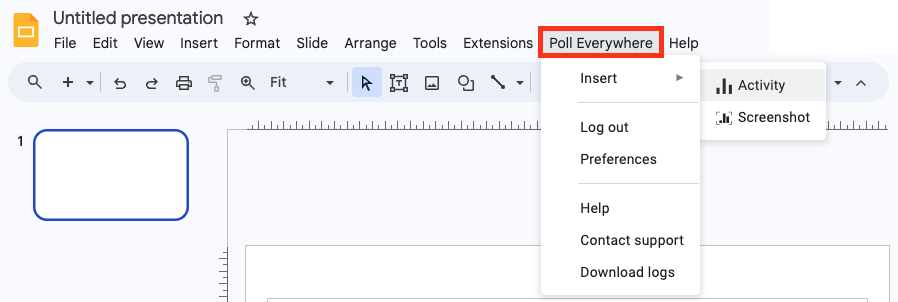
- Once the integration has successfully been added to your Chrome browser, you should see Poll Everywhere in the top banner menu of Google slides.
- Click on Poll Everywhere and then select Insert Activity.
- You may be prompted to login into your Poll Everywhere account.
- Once logged in, your Poll everywhere activities will be displayed in a pop-up window.
- Use the checkboxes to select one or more poll activities that you would like to insert into your google slides.
- Once selected, click Insert slides.
- You can choose the activity flow, then click Insert slides. The default activity flow displays the poll on a single slide, while presenting you have the option to lock and unlock the activity. The engagement flow displays the poll on three slides, which displays:
- a preview of the poll question
- the activated poll question
- the final results once the poll activity has been locked
- Once inserted, you will see a successful confirmation message. You can click Go back to activities to insert additional poll activities or close the pop-up window to return to your Google slides.
- When presenting your google slides, the poll activity on the current slide will automatically activate/deactivate.
Note: You must present in full screen mode for the Poll Everywhere activities to activate.
- Navigate to the Poll Everywhere integrations page.
- Click Learn More for Poll Everywhere for PowerPoint (Windows).
- Click the Download for Windows button. Once downloaded, follow the prompts to install the Poll Everywhere app.
- Once the integration has successfully been installed, you should see Poll Everywhere in the top banner menu of PowerPoint.
- Click on Poll Everywhere and then select Insert Activity.
- First, click Log in to log into your Poll Everywhere account.
- Once logged in, click Insert and then select Activity. Your Poll everywhere activities will be displayed in a pop-up window.
- Use the checkboxes to select one or more poll activities that you would like to insert into your Powerpoint presentation.
- Once selected, click Insert slides.
- You can choose the activity flow, then click Insert slides. The default activity flow displays the poll on a single slide, while presenting you have the option to lock and unlock the activity. The engagement flow displays the poll on three slides, which displays:
- a preview of the poll question
- the activated poll question
- the final results once the poll activity has been locked
- Once inserted, you will see a successful confirmation message. You can click Go back to activities to insert additional poll activities or close the pop-up window to return to your PowerPoint presentation.
- When presenting your slides, the poll activity on the current slide will automatically activate/deactivate.
Note: You must present in full screen mode for the Poll Everywhere activities to activate.
- Navigate to the Poll Everywhere integrations page.
- Click Learn More for Poll Everywhere for PowerPoint (Mac).
- Click the Download for Mac button. Once downloaded, follow the prompts to install the Poll Everywhere app. You will need to allow permissions for the Poll Everywhere app to view your screen. This allows the integration to activate polls on your current PowerPoint slide.
- Once the integration has successfully been added to your Chrome browser, you should see Poll Everywhere in the top banner menu of Google slides.
- Open Microsoft PowerPoint and the Poll Everywhere app. You may be prompted to login into your Poll Everywhere account.
- Once logged in, your Poll everywhere activities will be displayed in the Poll everywhere app.
- Use the checkboxes to select one or more poll activities that you would like to insert into your PowerPoint slides.
- Once selected, click Insert slides.
- You can choose the activity flow, then click Insert slides. The default activity flow displays the poll on a single slide, while presenting you have the option to lock and unlock the activity. The engagement flow displays the poll on three slides, which displays:
- a preview of the poll question
- the activated poll question
- the final results once the poll activity has been locked
- Once inserted, you will see a successful confirmation message. You can click Go back to activities to insert additional poll activities or close the pop-up window to return to your Powerpoint presentation.
- When presenting your google slides, the poll activity on the current slide will automatically activate/deactivate.
Note: You must present in full screen mode for the Poll Everywhere activities to activate.
 Enable grading
View
Enable grading
View
In weighted grading, certain types of activities count more than others. You can decide that certain questions are harder than others and therefore should be worth more. You can enable the Weighted grading feature on the Features lab page under the Beta features tab.
Important noticeIf seeking to export grades by points when using Moodle, the Weighted Grading feature needs to be enabled and Moodle needs to be set up to expect points. The choice for points or percentage needs to be made in the activity ahead of time as there is no choice upon exporting using LTI Advantage. |
Enable grading
- Navigate to Poll Everywhere Features lab.
- You can also navigate to the Features lab by clicking the Profile icon at the bottom left of the page, then selecting Features lab link on the left hand side menu.
- Select the Beta features tab, enable the Weighted grading option by switching the toggle to ON.
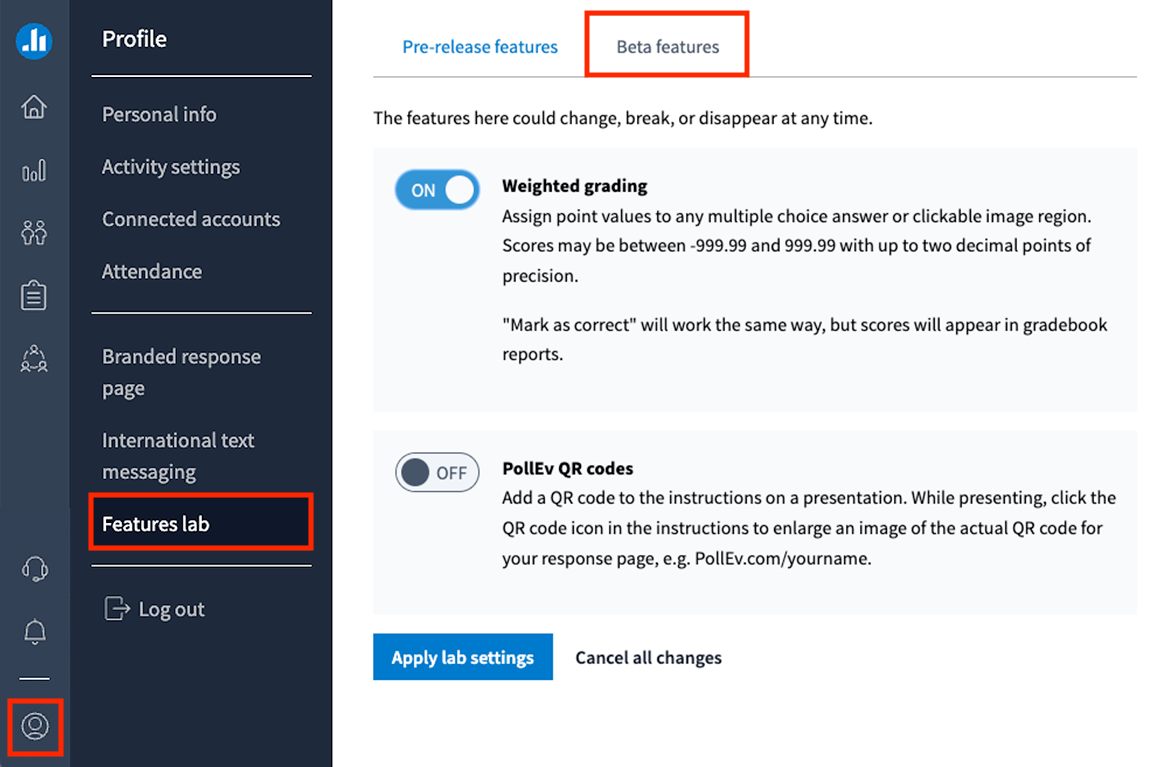
- Click Apply lab settings.
Assign points to Poll Everywhere activities (Multiple choice and Clickable image only)
- Once weighted grading has been applied, you can assign points to any Multiple choice or Clickable image activity. You can assign values between -999.99 and 999.99 (up to two decimal points).
- You can create a new Multiple choice or Clickable image activity or edit existing activities.
- Select the Assign points to different options checkbox at the bottom of the page. You can then type a value assigned to the answers for your question.
Note: Ensure that you have selected the correct answer(s) for your activity by clicking the tick so that it appears green.
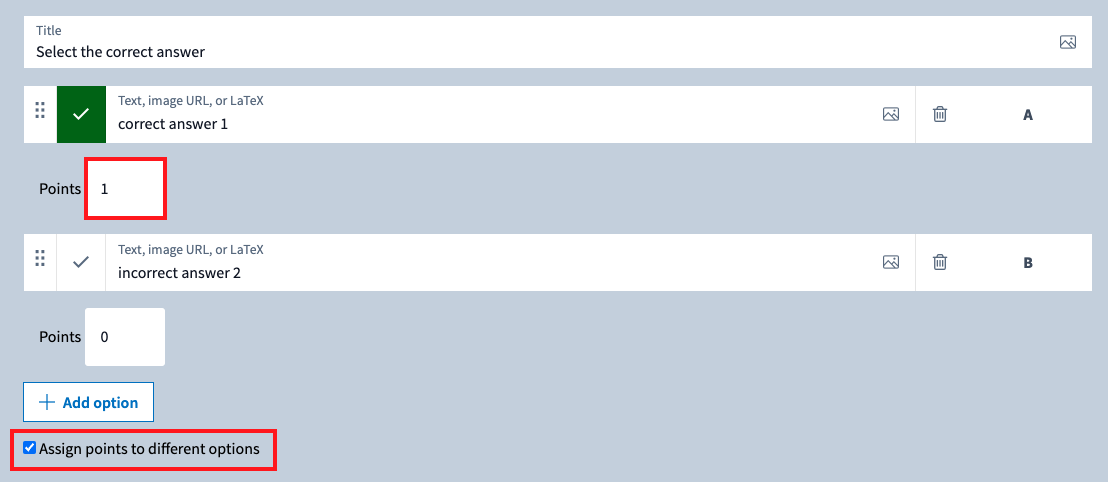
- Once finished, click Save.
These point values will now be applied to any responses and will be displayed in the Gradebook Report. They will also be calculated in the report’s CSV file download. This is seperate from your Moodle unit's gradebook report.
 View PollEverywhere reports
View
View PollEverywhere reports
View
If grading has been enabled, and you can export a report that displays a list of participants and how well they scored during your poll.
- Navigate to Poll Everywhere Reports or select the report icon from the left hand side menu. From the reports page you can see any previous reports that were generated for any Poll everywhere activities, includes the activity type and when it was generated.
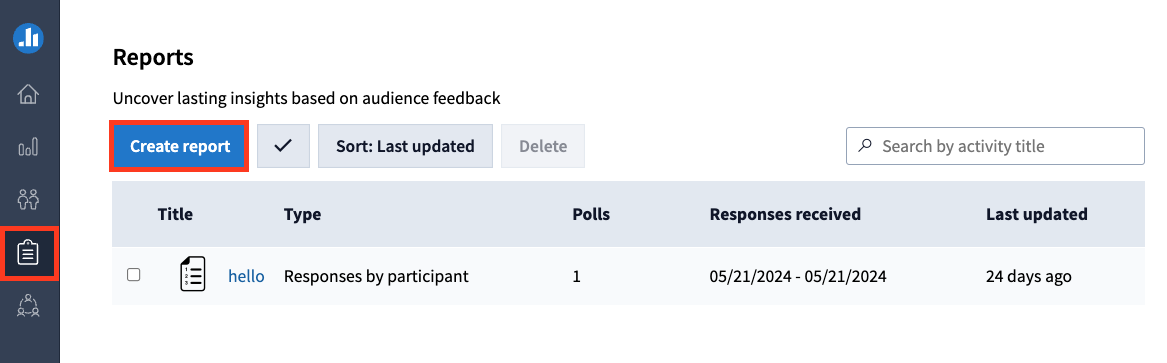
- Click Create report.
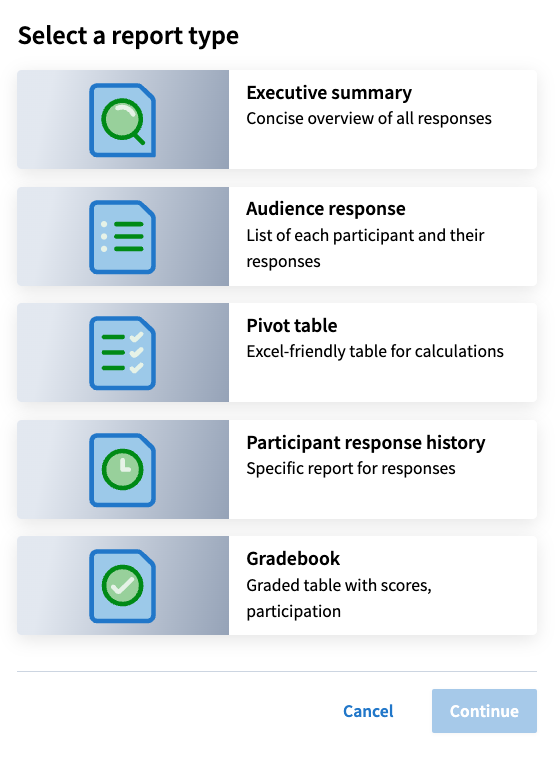
- Select Gradebook and then click Continue.
Note: If any of your questions allow anonymous responses, you will not be able to create a Gradebook report. Instead select the Executive summary report, which works with anonymous activities.
- With the checkboxes, select one of more activities that you would like to include in the report, then click Create report.
- Once generated, the report will open in a new tab and you will see a list of your generated reports in the report page. You can update the reports.
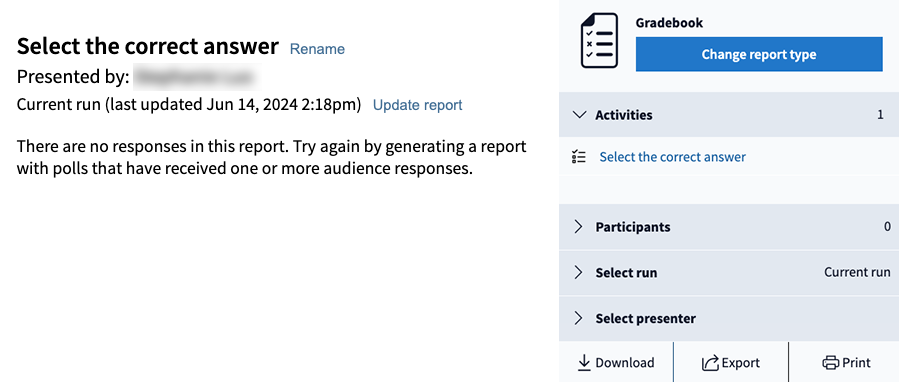
- On the left side of the screen you will see a table which displays a list of participants and how they scored during your poll. On the right side of the screen you will see different filter options including:
- Activities: Shows which activities were included in the report.
- Participants: You can sort participants by different groups.
- Select run: Choose to view results from when the activities were run at different times.
- Select presenter: Choose to view the report by the use who presented the activity.
- You can choose to download the report as a CSV file, export it to your Moodle unit's Gradebook and print out the table.

Poll Everywhere in action
Watch this video of Dr Tom Hiscox utilising Poll Everywhere to check understanding of pre-class work completed by first year Biology students.
For more support, see the suite of guides provided by Poll Everywhere for: