Set up the FeedbackFruits Peer Review activity
The Peer Review activity allows students to provide feedback and/or marks on tasks submitted by their peers according to criteria specified by the lecturer. Marking and feedback activities can be allocated for individuals or via groups. Steps can be built in for students to reflect on their own feedback.
The Peer Review activity can be combined with the Group Member Evaluation tool to allow students to also provide feedback on the quality of the contribution to a group task, not just the task itself.
Watch the video below to learn how to set up the Peer review activity
-
- Fill in instructions for the activity for students. You can format and structure your text using markdown elements. For more information about essential Markdown elements you can use to format your instructions, see here. You can click on Add items to record an audio or video clip, or attach a file, if desired.

- Click Change to specify whether students will hand in work individually or as a group, and review their peers individually or as groups.
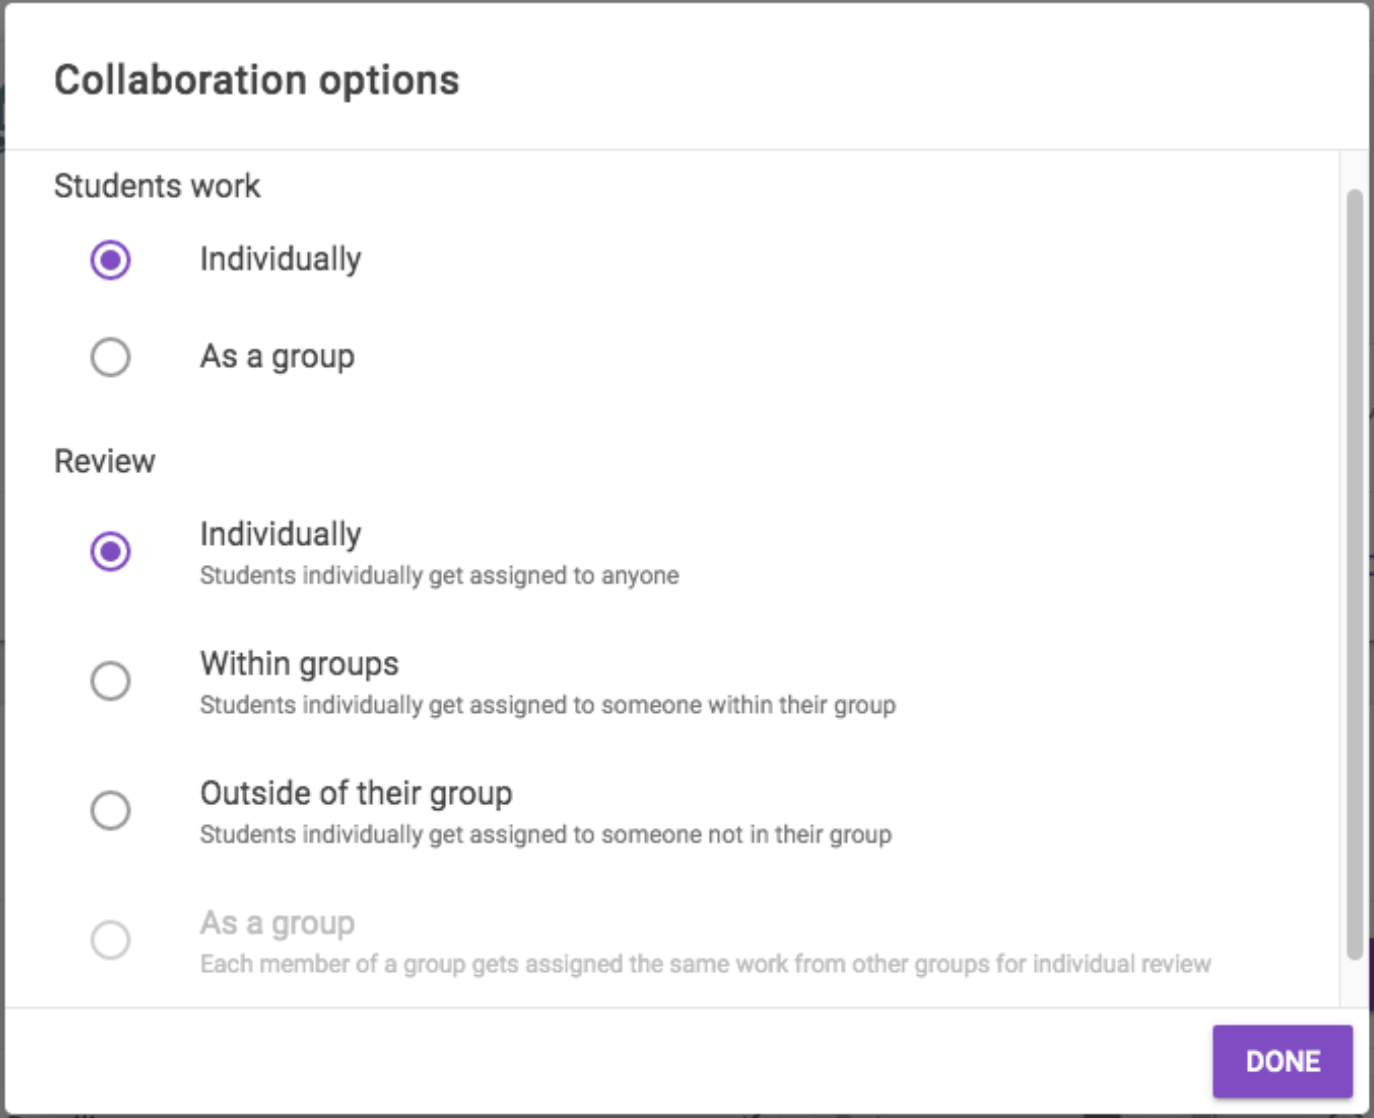
- Select from the Collaboration options below:
- Students work:
- Individually
- As a group
- Review:
- Individually: Students are individually assigned to anyone.
- Within groups: Students individually get assigned someone within their group.
- Outside of their group: Students individually get assigned to someone, not in their group.
- As a group: All members of a group get assigned the same work
The table below provides examples of scenarios for collaboration options
Students work individually Students work as a group Review individually
Students are individually assigned to anyone
All students work individually, for example an individual presentation, and you would like the students to review other students individually Students have collaborated on a project as a group, and need to review another group individually. Within groups
Students individually get assigned someone within their group
Students will individually review members of their group, for example, on collaboration skills and group participation. This is the most commonly used option for assessing teamwork and team performance within a group. This option is disabled when students work as a group is selected.
Outside of their group
Students individually get assigned to someone, not in their group.
Students will individually review members outside of their group. For example, groups have been sorted by presentation topic and students need to review someone with a different presentation topic. This option is disabled if students work as a group is selected.
As a group
All members of a group get assigned the same work
This option is disabled if students work ‘individually’ is selected.
Students have collaborated on a project as a group, and you would like the students to all review the same other group. - Students work:
- If you choose a collaboration option where students will work in groups, you will be prompted to choose which groups will participate. Your Moodle groupings will be automatically synced from your Moodle unit.
- Select all groups within a grouping using the checkbox.
- You can expand a grouping to view all groups within a grouping. You can further expand groups to view all students within a group.
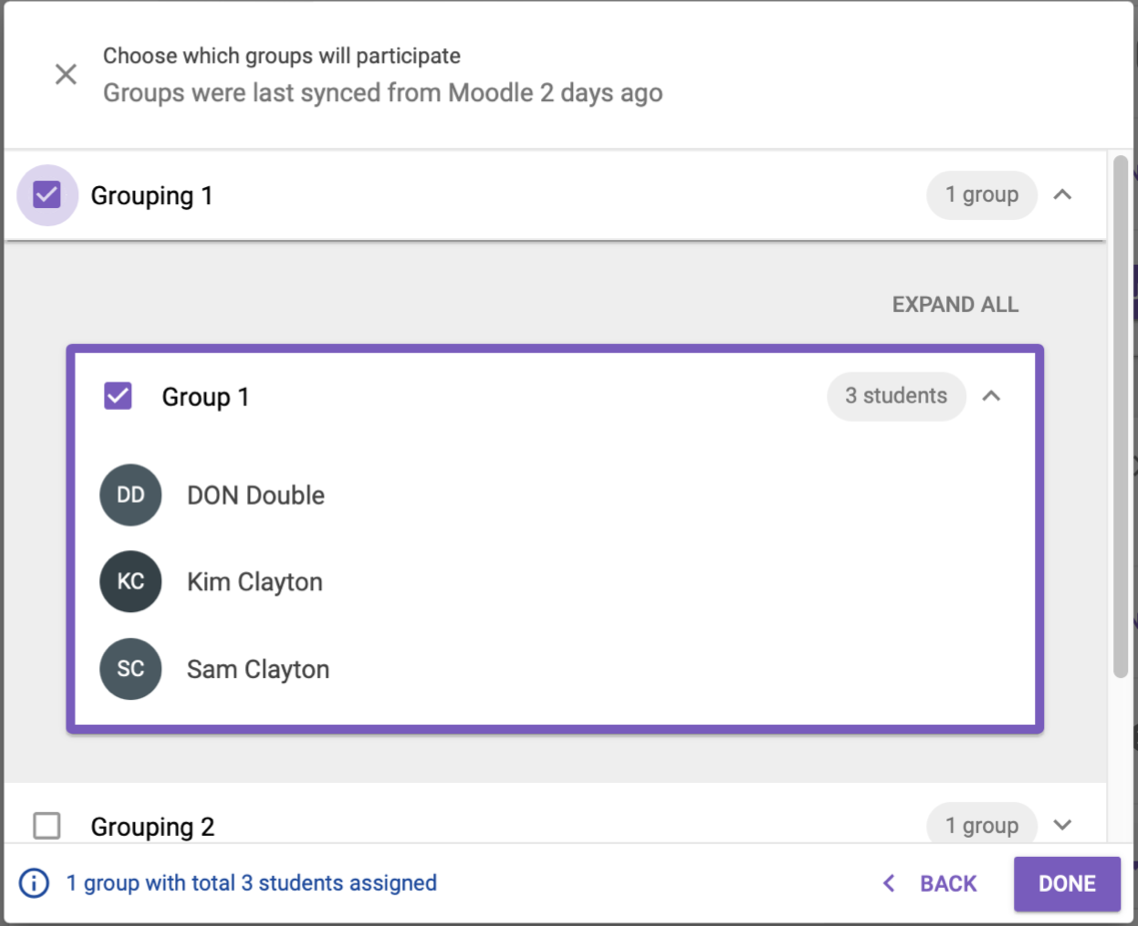
Note: You choose specific groups within a grouping without selecting all groups within the grouping.
- The bottom left corner will display the total number of students within your chosen groupings that will be assigned to the FeedbackFruits activity.
- When finished, click Done. If you wish to change assigned groups, click Configure groups.
Manual Moodle group sync
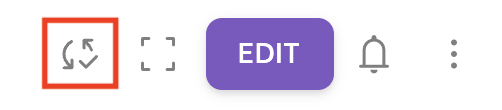
You can check when your FeedbackFruits activity was last synced with Moodle by clicking the sync icon in the top right hand corner.
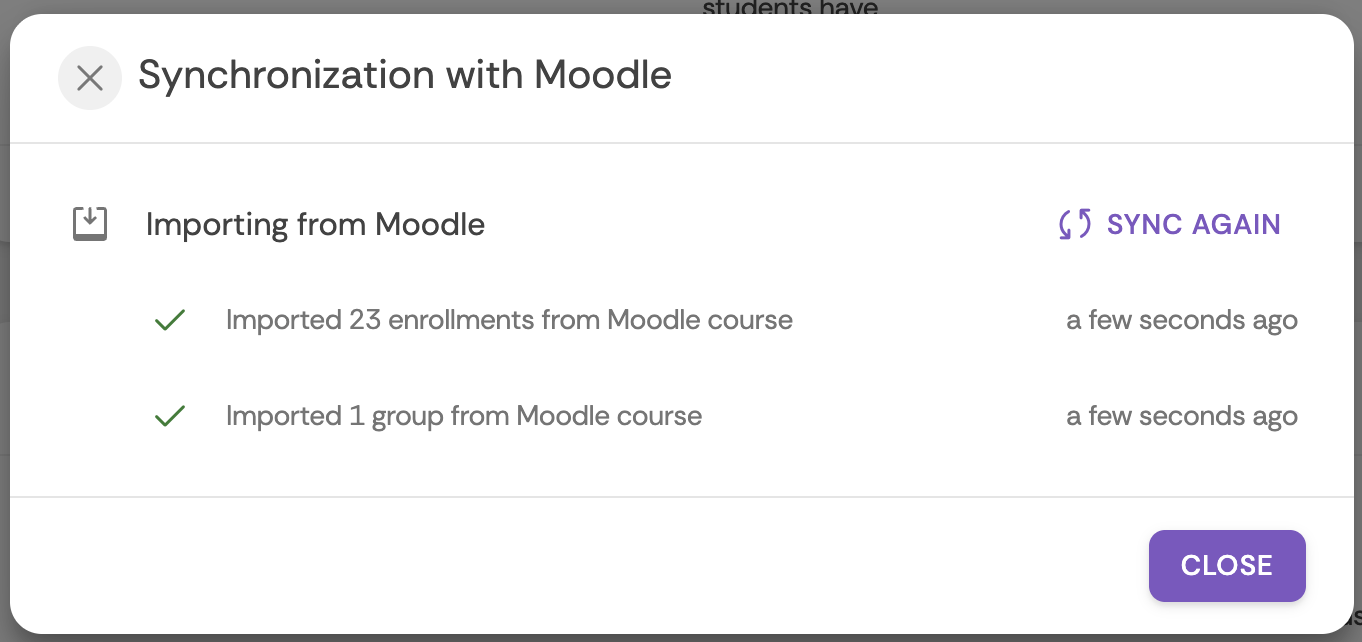
To manually sync your Moodle groups again, click Sync again.
Note: You will not be able to publish/save the assignment if you leave the instructions field blank.
- Fill in instructions for the activity for students. You can format and structure your text using markdown elements. For more information about essential Markdown elements you can use to format your instructions, see here. You can click on Add items to record an audio or video clip, or attach a file, if desired.
-
In Submissions, specify the number and type of file you require students to submit. You can choose whether students are required to submit exactly, minimum or between a certain number of files. Students can also hand in more files than required.
Expand the accordions to learn more about each setting
-
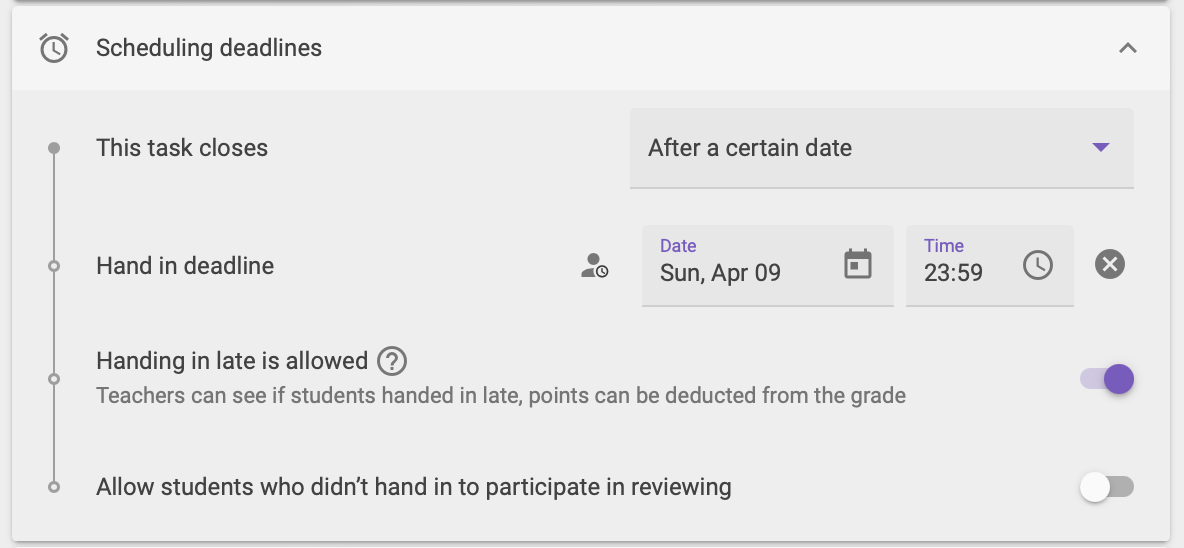
Set a deadline for students have upload their work by. When the deadline has passed, students will be assigned work of a peer or group to review. Once you set a deadline, additional options will appear:
- Allow late hand in: If you have set a deadline, you can allow students to hand in after the submission deadline has passed by switching the Allow late hand in button to ON (Purple). Enabling this option will still allow you to see if students have submitted before or after the deadline.
- Allow students who didn't hand in to participate in reviewing: This will allow students who have not handed in a submission to also be assigned peers to review.
Note: When no deadline is set, students are assigned work to review when at least 2 students have handed in their submissions. If you would like to run your FeedbackFruits activity as a 'live' feedback session, you can leave the deadline blank.
-
Check the boxes next to the file types you want to allow students to submit. For an overview of which formats are supported for each file type, click here.
Note: Embedded audio and video in documents and slideshows cannot be played in FeedbackFruits.
-
Submissions appear anonymously for peers to review. Teachers will be able to see the student's name attached to the submission.
Note: If students have included their name in their file, it will still be visible.
-
If you have specific hand-in instructions for your students for example required format, line spacing, file naming convention, you can enter instructions here.
Note
For written assessment tasks, the Automated Feedback module allows you to define writing criteria including structure, argumentation, clarity, citations, grammar and tone that you would like students' work to be checked against. Students will receive instant automated feedback, allowing them to improve their work and address common mistakes before final submission.
For more information, see Automated feedback.
-
-
In Given reviews, specify the feedback criteria that students will use as a guide give their peers feedback, set a deadline for when students should complete their reviews and select whether students will be able to read their received feedback instantly, or at a scheduled date.

In Feedback criteria, click Configure to specify the criteria that students will use to give peer feedback. You can choose to create new feedback criteria, or use existing feedback criteria from high-level templates or previous activities.
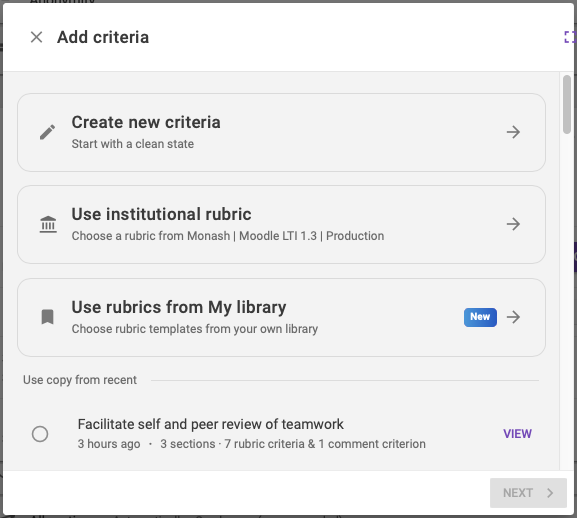
- Click Create new criteria.
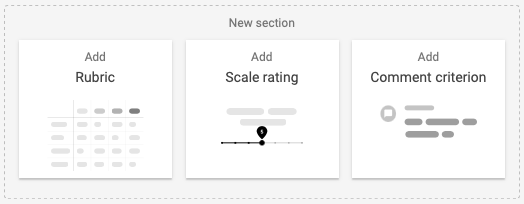
- Select Rubric, Scale rating or Comment criterion. You can use a combination of different criteria within your FeedbackFruits activity.
-
Rubrics allow you to provide detailed explanations for each level of the criterion, for example, what qualities an "excellent" or "poor" performance of a criteria look like.
Click the plus icons to learn more about building rubrics in FeedbackFruits
- Modify the blank default rubric to suit your requirements:
- Criterion:
- Add criterion by clicking the +Add criterion button
- Delete criterion by clicking the X
- Reorder criterion by clicking the up or down arrows on the left of the criterion.
- Allow comments by clicking the Allow comments checkbox. Specify the minimum number of comments students are required to write by clicking the up and down arrows in the required field.
- Rubric levels:
- Add levels by clicking on the purple plus icon on the right of the screen or by clicking the three dots for an existing level and inserting a new level to the left or the right.
- Delete levels by clicking the three dots and selecting Delete level.
- Reorder levels clicking the three dots and selecting Move level left/right.
- Specify the number of points allocated to each level by clicking the up and down arrows in the points field.
- Descriptors: Click on each blank field to add a description per level for each criterion.
- Criterion:
- When finished, click Done.
- Modify the blank default rubric to suit your requirements:
-
The scale rating allows students to evaluate each other's work on a numerical scale. You can also allow students to add comments so they can provide a rating and additional reasoning to support their given rating.
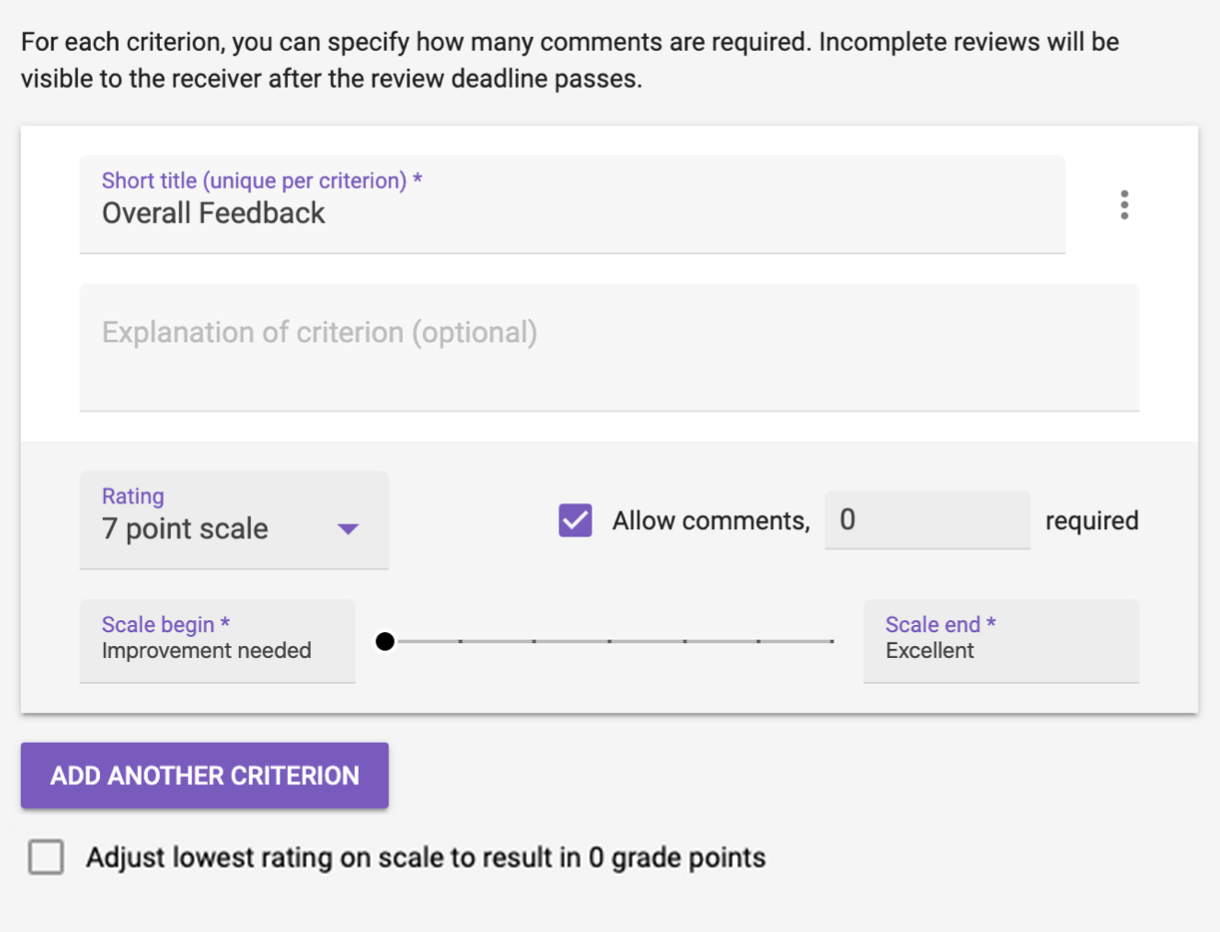
- Enter a title and an optional explanation of the criterion to provide a guide for students.
- From the Rating dropdown list, choose the type of rating you want to use. The 7 point scale is recommended by FeedbackFruits as it allows enough structure for students to give detailed feedback, while still allowing students to maintain oversight.
- If required, you can adjust the lowest rating on scale to 0 by selecting the Adjust lowest rating on scale to results in 0 grade points checkbox at the bottom of scale criteria.
- Customise the beginning and end of the scale by entering text into the Scale begin and Scale end fields. By default, these are set to “improvement needed” and “excellent” respectively.
Note: Only the beginning and end of the scale are named. When students move the slider, they will see numbers that indicate the grade.
- Tick the Allow comments checkbox to allow students to provide an additional supporting comment. You can specify the minimum number of comments students are required to write by entering a number in the required field.
- When you are finished, click Done.
-
Use comment criteria when you want students to give qualitative feedback only, without assigning a grade as a part of their feedback.
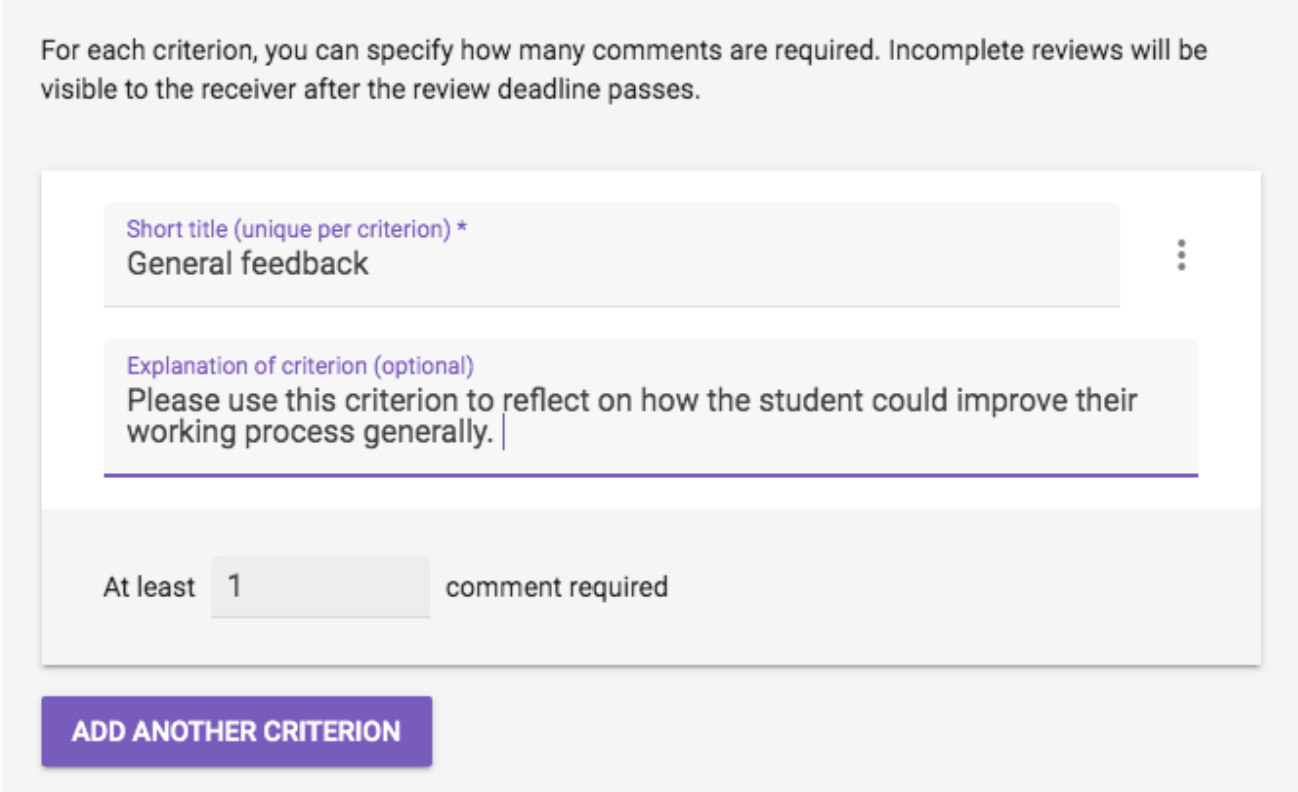
- Enter a title and an optional explanation of the criterion to provide a guide for students.
- Specify the minimum number of comments students are required to write.
- Click add another criterion to add another comment criterion.
- When you are finished, click Done.
Institutional level rubrics have been validated and are supported by research.
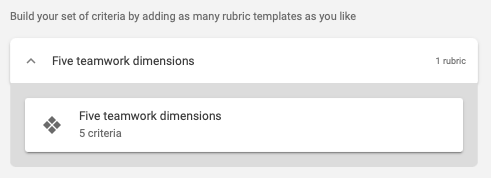
Click on the title of the rubric to preview it. To use the rubric, click Use this rubric.
If you have previously created a FeedbackFruits activity, you can reuse feedback criteria from a previous activity.
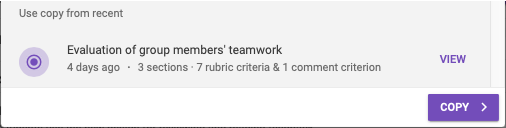
From the Use copy from recent list, select the FeedbackFruits activity you would like to use and then click Copy.

Once created, your feedback criteria will be displayed as a section. You can:
- Click Edit section to continue editing the feedback criteria within that section.
- Click on the three dots to delete feedback section or rearrange the order of sections.
- Continue to add additional Feedback criteria (Rubric, Scale rating or Comment criterion).
- Enable section headings. This will allow you to customise the title of the section.
Once you have finished adding feedback criteria, click Done.
Given reviews settings
Expand the accordion items below to learn more about each configurable setting for Given reviews.
-
Specify how many peer reviews a student is required to give to peers/group members/groups to complete this section of the activity. If you want all peers to review each other, select All.
Note: It is recommended that you set this to at least 3, as this provides students with a more diverse exposure to ideas and perspectives, compared to receiving just a single review.
-
You can toggle the switch to Enable(Purple) or Disabled(Grey) this setting. If enabled:
- Students review themselves based on the same criteria set.
- Self-assessment is visible side by side with their peer reviews for contrast.
- When working as a group, assessment is also on the performance of the group, and visible to all group members.
-
Set the time and date that students must complete their written peer feedback. Reviewers will not be able to view or edit their reviews after the deadline passes. You can leave the deadline blank to allow reviewers to view and/or edit their feedback indefinitely.
-
In Allocations, click Change to change the allocation method. Select your preferred method of allocation, then click Done to save your changes.
Note: You can manually assign allocations, if required. For more information, see Manual allocations.
The table below provides an explanation of allocation options
Allocation method Use case Limitations Automatically - One by one
Students will be assigned a review one by one, a peer will only be allocated when the student starts each subsequent review, and so on. This is the default and recommended method of allocation as it ensures the fairest distribution of reviews in case some students don’t participate in the activity. Students are not able to see all the peers they are allocated to review in advance. In situations where students having prior knowledge of their allocations is desirable, for example if students are required to review their peers for a group presentation, automatically - all at once may be more suitable. Automatically - All at once Students will be assigned all the reviews they'll have to complete at once. This option is only recommended when the required amount of reviews is set to All, as students will be able to see all the peers they're required to review at once, rather than having to complete the first review before continuing with the second.If students only complete 1 review, the others can no longer be assigned to someone else who does complete all the reviews.Manually Manually allocate someone for each student to review. If you do not assign a student someone to review, they will not be able to participate in the activity. A significant amount of manual work is required for this allocation. For more information, see Manual allocations. Students choose who to reviewOnce the review process has started, students will be able to select the student or group they want to review at the review step. If multiple reviews are required, students will select the allocations one after another. This allocation method cannot be enabled if:- if ‘students review as a group’ has been selected, as group members will have the same review allocation.
To learn more about how peers are automatically assigned, see FeedbackFruits: How are peers assigned?
-
Note: You will still be able to view the student's name. Reviewers will appear to their peers anonymously.
Recommended use case Enable reviewer anonymity Students are new to giving feedback to their peers. This provides a safe learning environment that lowers the threshold for giving honest and valuable feedback. Disable reviewer anonymity Students have grown familiar with giving feedback anonymously. This helps prepare them for life after studies, where feedback is expected to be given without the protection of anonymity. -
Choose when the students can see their feedback from the following options:
- Immediately: As soon as a student has posted their peer feedback, their peer will be able to read it.
- After release date: Once the deadline has passed, students will be able to read peer reviews.
- A certain date: Set a date other than the deadline when students will be able to read peer reviews.
- Never (release manually): You can view peer reviews but students will not be able to read the peer reviews they have received. You can manually publish feedback at any time.
-
You can toggle the switch to enable(Purple) or disable(Grey) the following settings.
Feedback tips for reviewing
Students will see a randomly selected tip from the following default tips while they write feedback:
- Be sure to make your feedback actionable (concrete suggestions for improvement)
- Remember to link it back to the main criteria of the assignment
- Try to balance your review; recognise both strong and weak points
- Remember to ask for clarification, or elaboration on points you don’t understand
- Try to ask questions that encourage reflection
- Remember to critique the writing, not the writer
- Before critiquing someone’s worldview or arguments, consider their statements in the most rational way possible, and interpret their strongest arguments
- If you think a worldview or opinion is wrong, try probing questions
- If you were receiving this feedback, would you find it helpful?
- Remember to keep the tone of your feedback motivational
- Try to use a tone of feedback that you’d also like to receive.
You can click the X beside the tip to delete a tip or click Add another tip to enter your own tips.
Review checklist
Checklist that will be shown to students before handing in to help improve quality. This checklist will be shown to a student at the bottom of their criteria, to help them reflect on how they formulated their feedback and if they would like to go back to edit some things.
Feedback coach (AI-powered feature) - beta
The Feedback Coach feature assists students in writing better reviews by providing real-time tips to help improve the quality of the feedback.
How it works:
- The feedback appears next to the feedback comment field as students write reviews
- It provides real-time suggestions for improvement tailored to the feedback criteria, language use, and content of the review.
- Your students have the option to disable this in their preferences even if you enable the feature
Instructions for giving feedback
Enter additional instructions for students to keep in mind while they give feedback.
-
In Received reviews, students read the feedback they received. You can also enable students to rate their reviewers. This could motivate students to give better feedback and to improve.
Set an optional deadline for students to read their received reviews. Students can still view the feedback and their reflection after the deadline, however they will not receive any grades for Has read all received feedback if they read their recieved reviews after the deadline.
Once students have completed this step, you can publish student feedback for their peers to receive.
Note: If you do not set a deadline, students can write and/or edit their reflection indefinitely.
-
- Click + Add learning step below the grading section to add an optional reflection module.

- Click Add for Reflections.

- The Reflections module allows students to write a reflection on the activity and is added after Received reviews, meaning students complete this after they have read reviews.
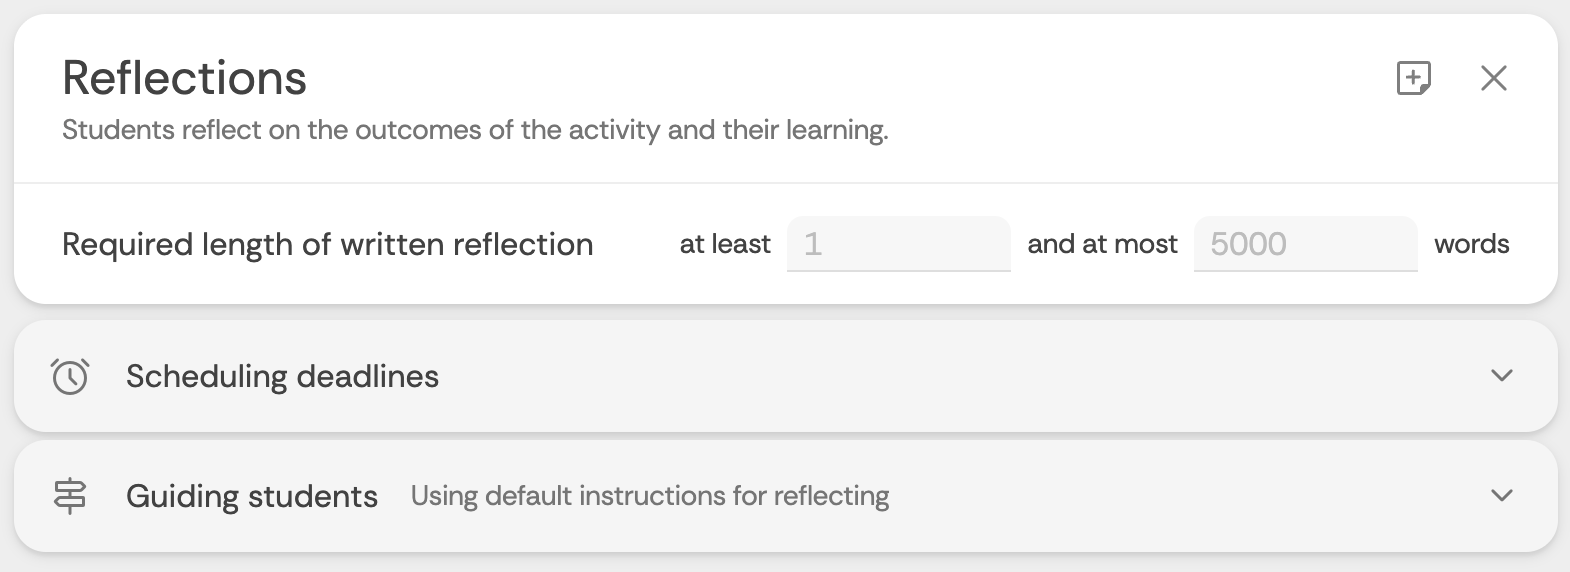
- Specify a minimum and maximum word count for the written reflection.
- In Scheduling deadlines, you can set an optional deadline.
- In Guiding students, you can:
- Enable the Reflection coach (beta): Students will received AI-powered real-time feedback to improve their reflections
- Enter optional instructions to guide students in writing their reflection. By default, some guiding principles are provided.
- Click Add items to attach an audio/video file or a file attachment.
- Click + Add learning step below the grading section to add an optional reflection module.
-
In Grading, adjust the weighting to determine how much each step of the feedbackfruits activity will contribute towards the final grade. You should configure grading before students begin the activity.
- Click Configure.
- You will see each step (Grading facet) of the feedbackfruits activity.
- Use the buttons in the Include column to include (Purple) or exclude(greyed out) a step from contributing to the final grade. Excluding a step is the equivalent of setting the weighting to 0.
- In the weight column, enter your desired weighting.
- Ensure that the total equals 100.
- Click Done.
Click on the icons below to read more about each grading facet
Note: Weightings you have allocated for Completed giving feedback, Has written the minimum number of review comments and Ratings received on work in total will appear as the sum total weighting for the Given reviews step. For example, Completed giving feedback(40%) and Ratings received on work in total(40%) will appear to students as the Given reviews being worth 80% of the mark.
Grading settings
Click on Settings to expand the Settings accordion. Click the toggle to switch the setting ON (Purple) or OFF (Grey). You can enable:
-
This setting functions as a threshold hurdle. Once enabled, set the score students must achieve to receive a pass grade by entering a number.
When you have finished setting up the FeedbackFruits activity, click Save in the top right corner of the screen. To edit the settings of the FeedbackFruits activity, click Edit in the top right corner of the screen. When you’ve finished making changes as required, click Save.
Note: Some settings cannot be changed when students have made progress with the activity.