Set up marker allocation and marking workflow
Marking workflow in Moodle Assignments is a system that can be used to track which stage of marking has been completed for individual student assignment submissions. It can be handy when there are multiple tutors and lecturers involved in marking. You can assign marking of individual or groups of student assignments to markers and use marking workflow to monitor the progress of the marking process.
NoteIf Grade penalty is in use for an assessment, the late penalty is not applied until the grades are released to the students. |
Enabling marking workflow and marker allocation
- In the top right hand corner of the page, switch Edit mode to ON(Blue).

- For the Assignment that you want to enable marking workflow and marker allocation, click on the three dots, then select Edit settings.
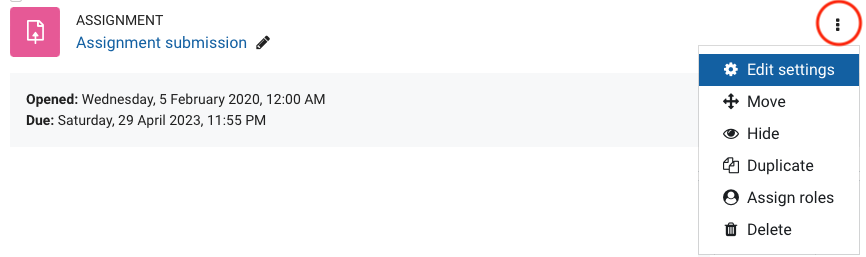
- In the Grade section, select Yes for Use marking workflow. Once you have done this, select Yes for Use marking allocation.
- Click Save and Display.
Marker allocation


Marking workflow
Marking workflow allows students, tutors and lecturers to see the marking status of submitted assignments. Lecturers can review and moderate results and release feedback and grades to students once grading is completed.
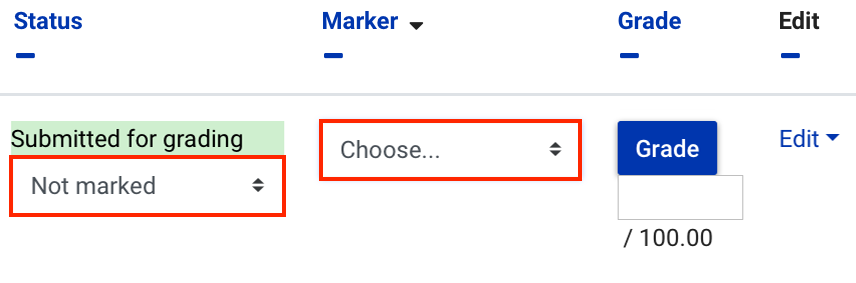
The workflow states are shown below:
- Not marked: Initial state
- In marking: Marking has begun, typically after the due date
- Marking completed: Submission has been marked but marker is able to check and revise
- In review: Submission(s) are being reviewed (often as part of a moderation phase)
- Ready for release: Review complete
- Released: Feedback and grade released to the students
