Attendance (Moodle activity)
The Attendance activity allows online marking of attendance. A teacher can take attendance, print reports and allow students to view their own record. You can also allow students to mark their own attendance. You can add the Attendance block to have quick access to attendance on your Moodle site.
- In the top right hand corner of the page, switch Edit mode to ON(Blue).

- In the section where you would like to add a resource or activity, click +Add an activity or resource.

Note: You can add new resources or activities above or below any existing activities or resources.
- Select Attendance.
- You may change the Name of your Attendance activity and change the Grade if required.
- In Common module settings, you may wish to set group mode to visible groups and select a specific grouping, for example for Tutorial groups or Laboratories, etc. For more information about Grouping/Groups, see Create groups and groupings in Moodle.

- In the Restrict access settings, you may wish to set up access restrictions based on groups and groupings, so that only students belonging to a specific group can see the activity.
Note: For multiple groups, consider setting up multiple attendance activities.
- In the Monash Assessment setting, if the attendance activity is ungraded, select No. If graded, select Yes.
- In the Special consideration settings, for Is Special consideration available/applicable, select No. For Is this a graded activity that contributes to the final mark, select No.
- Once complete, scroll down to the bottom and click the Save and display button.
Example of Attendance activity with visible groups

Attendance sessions
Now you need to add sessions to your Attendance activity.
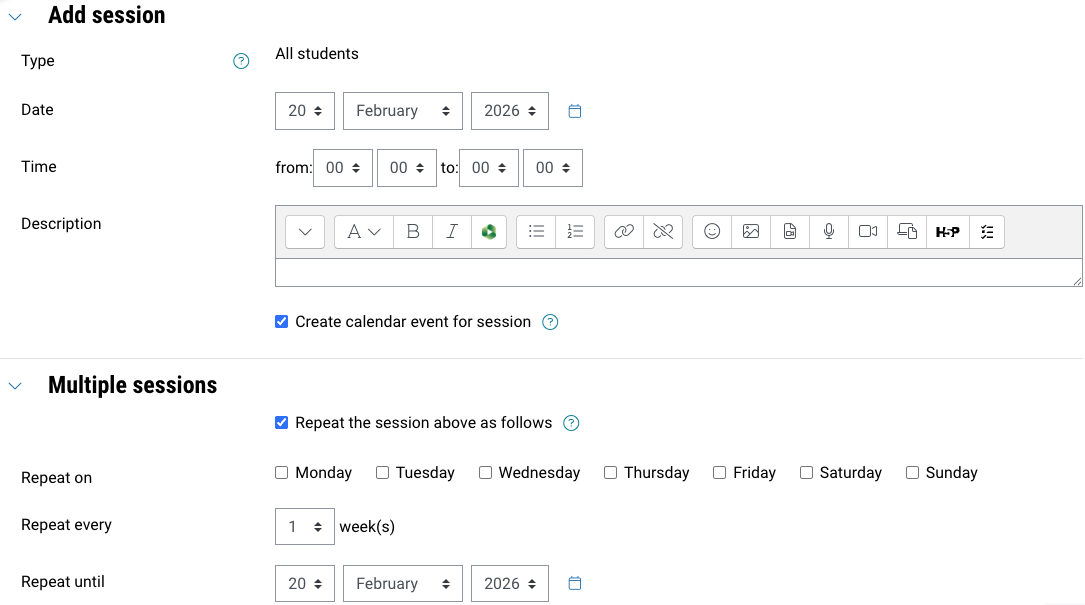
- Click on the Add session button.
- Select a date, time and description for your attendance activity.
- To create a repeating session, ensure you tick the Repeat the session above as follows checkbox and select the required options.
- If you wish to allow students to mark their own attendance, in the Student recording section, check the Allow students to record own attendance checkbox. You also assign a password or QR code for students.
- Click the Add button.
- Once complete, your attendance activity should resemble the following:
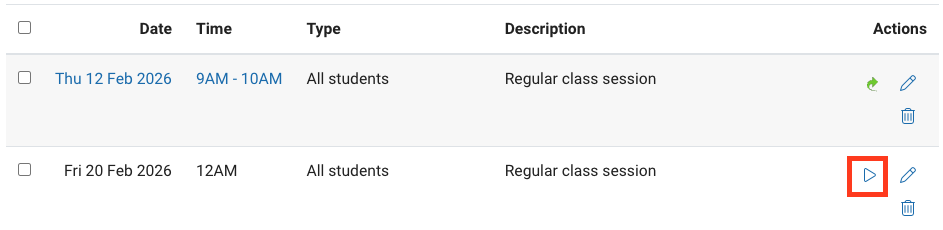
Note: The blue arrow indicates that attendance still needs to be taken for that session. To take attendance, click on the blue arrow.
Taking attendance
- Navigate to the attendance activity.
- Click on the blue arrow next to the session.
- You can quickly mark attendance by clicking on the letter abbreviation in the first row, using the drop down list to set status for all or unselected students. You can include an optional Remark if needed.
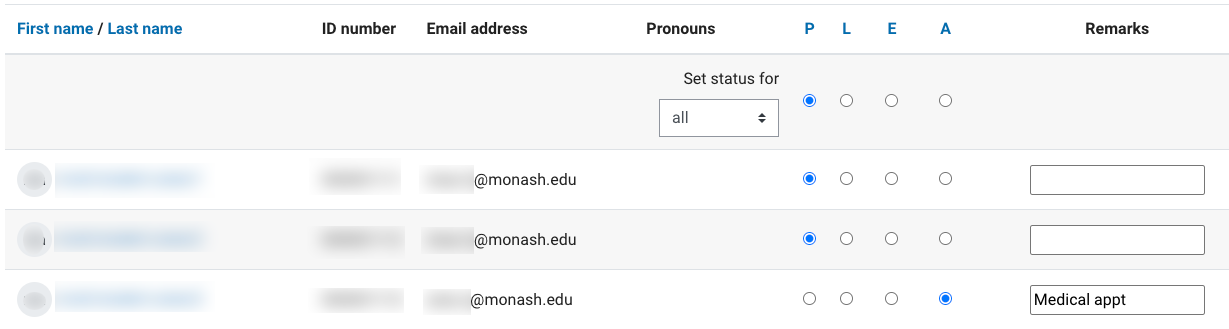
- Click on Save and show next page to save your changes.
Self-recording attendance
When you create a session, you can choose to allow students to mark their own attendance.
- In the session settings, check Allow students to record own attendance.
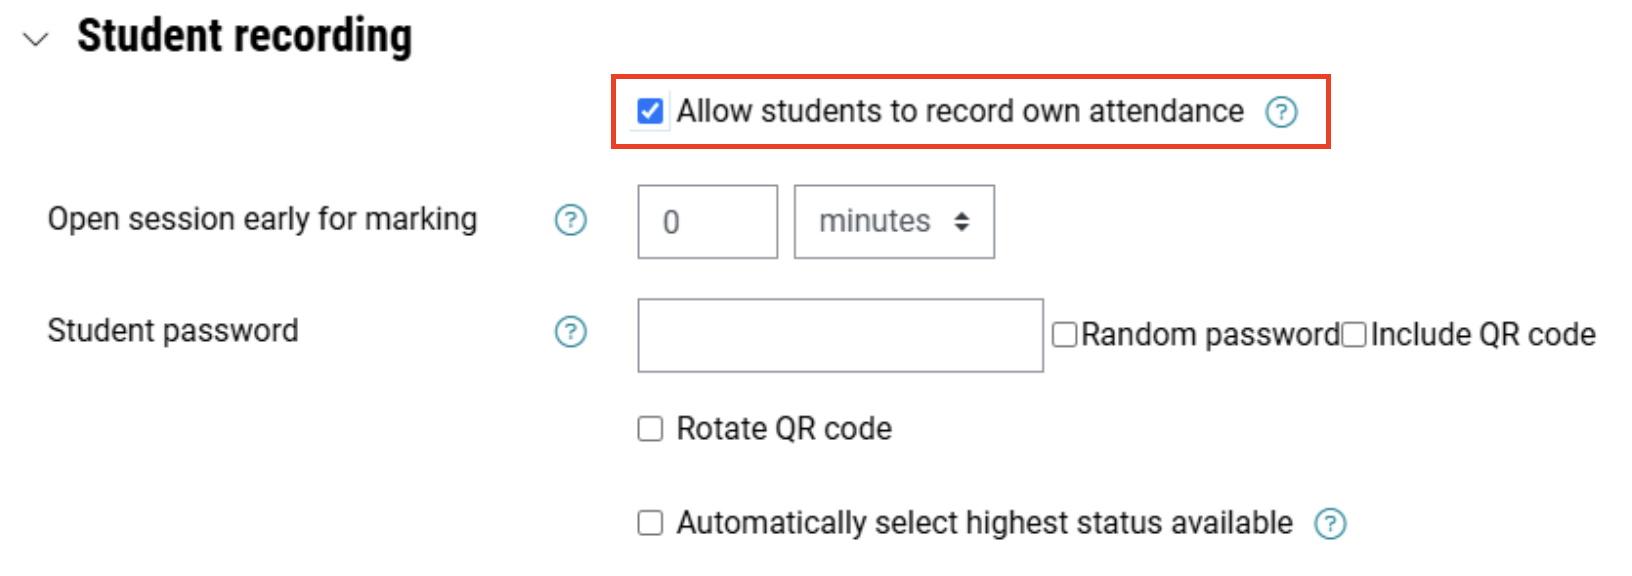
- Select how many minutes before the session time you wish to allow students to record their attendance. This can be zero.
- Either select password (you can set one or allow Moodle to randomly assign one) or QR code for the session.
- Password: When the session commences, you will see a key icon next to the session. Clicking this will open a new tab displaying the session password that you can share with students. Students can then navigate to the activity on their device and click Submit attendance to enter the password. They can then click Present to mark their attendance.

- QR code: If you chose to add a QR code above, you will see a QR code icon next to the session. Clicking this will open a new tab displaying the QR code that students can scan with their mobile device. This will take them directly to the page where they can click Present to mark their attendance.

- Password: When the session commences, you will see a key icon next to the session. Clicking this will open a new tab displaying the session password that you can share with students. Students can then navigate to the activity on their device and click Submit attendance to enter the password. They can then click Present to mark their attendance.
Other attendance actions
Expand the accordions below to learn more about additional attendance actions.
